The purpose of the blog series
I wanted to create a blog post that could help the community, to use the App Firewall. Thit is one of the features that can help secure applications, running behind the ADC. But there seems to be a fear towards it, because admins have tried to enable it and something broke in the application behind it.
I think the biggest issue with App Firewall is understanding the application we want to protect, and one could argue that the ADC admin isn’t responsible for knowing how the application works.
In my experience the ADC admin is often the person that must figure out how the application works, because a lot of application owners only know how to use the application, not how it works.
So hopefully by the end of this series, you the reader, will have a better understanding on web attacks and how to counter them.
I will use an insecure web application called webgoat, that comes with lessons builtin allowing the reader to explore common vulnerabilities.
My most important advice will be to get to know the application developer. They should know how their application functions, what are expected requests and what should be blocked.
The environment
I run most of my web testing environment on a virtual Ubuntu server on my Intel Nuc.
The Ubuntu server is running a docker environment, which is perfect as webgoat got a docker image, that makes it easy to deploy.
If you want to run the webgoat/wolf using docker run, you can use the following cmd:
docker run -d -p 8080:8080 -p 9090:9090 -e TZ=Europe/Amsterdam webgoat/goatandwolf
But I like convert the run command into a yaml file, so I can use docker-compose. There is this little website that can create a yaml configuration from the run command, visit https://composerize.com/
I’ve changed the frontend port for the webgoat to port 8000, as I have something else running on port 8080.
mbp@mbp-virtual-machine:~/docker$ cat goat-with-reverseproxy.yaml
version: ‘3.3’
services:
goatandwolf:
ports:
– ‘8000:8080’
– ‘9090:9090’
environment:
– TZ=Europe/Amsterdam
image: webgoat/goatandwolf
Run it using docker-compose -f goat-with-reverseproxy.yaml up -d or add it to your docker-compose.yml
The ADC
I’m running a Citrix ADC VPX 3000 Premium on my Intel nuc (long live partner licenses)
I’ve created 2 non-addressable load balancing servers on my ADC, pointing to the Ubuntu server on IP 192.168.0.10 and the ports 8000 for webgoat and 9090 for Webwolf. Then I created a couple of content switching policies, where I limit the traffic to only be accessable from my LAN and using the correct hostname.
There is also a responder policy bound on each LB to let the client know that requests against / should be to /WebGoat/ or /WebWolf/ depending on which LB the request landed at
The CLI configuration is as following:
#Server
add server Ubuntu 192.168.0.10
#ServiceGroup
add serviceGroup LB_SG_Webgoat HTTP -maxClient 0 -maxReq 0 -cip DISABLED -usip NO -useproxyport YES -cltTimeout 180 -svrTimeout 360 -CKA NO -TCPB NO -CMP NO
add serviceGroup LB_SG_WebWolf HTTP -maxClient 0 -maxReq 0 -cip DISABLED -usip NO -useproxyport YES -cltTimeout 180 -svrTimeout 360 -CKA NO -TCPB NO -CMP NO
#Binding Servers to ServiceGroup
bind serviceGroup LB_SG_Webgoat Ubuntu 8000
bind serviceGroup LB_SG_WebWolf Ubuntu 9090
#Load balancer
add lb vserver LB_WebGoat HTTP 0.0.0.0 0 -persistenceType NONE -cltTimeout 180
add lb vserver LB_WebWolf HTTP 0.0.0.0 0 -persistenceType NONE -cltTimeout 180
#Binding ServiceGroup to LB
bind lb vserver LB_WebGoat LB_SG_Webgoat
bind lb vserver LB_WebWolf LB_SG_WebWolf
#Responder Action
add responder action res_act_webgoat redirect "\"/WebGoat/\"" -responseStatusCode 302
add responder action res_act_webwolf redirect "\"/WebWolf/\"" -responseStatusCode 302
#Responder Policy
add responder policy res_pol_webgoat "HTTP.REQ.URL.EQ(\"/\")" res_act_webgoat
add responder policy res_pol_webwolf "HTTP.REQ.URL.EQ(\"/\")" res_act_webwolf
#Binding Responder Policy to LB
bind lb vserver LB_WebGoat -policyName res_pol_webgoat -priority 100 -gotoPriorityExpression END -type REQUEST
bind lb vserver LB_WebWolf -policyName res_pol_webwolf -priority 100 -gotoPriorityExpression END -type REQUEST
#Content Switch Action
add cs action cs_act_Webgoat -targetLBVserver LB_WebGoat
add cs action cs_act_Webwolf -targetLBVserver LB_WebWolf
#Content Switch Policy
add cs policy cs_pol_Webgoat -rule "http.REQ.HOSTNAME.SET_TEXT_MODE(IGNORECASE).EQ(\"webgoat.netscaler.dk\") && CLIENT.IP.SRC.IN_SUBNET(192.168.0.0/24)" -action cs_act_Webgoat
add cs policy cs_pol_Webwolf -rule "http.REQ.HOSTNAME.SET_TEXT_MODE(IGNORECASE).EQ(\"webwolf.netscaler.dk\") && CLIENT.IP.SRC.IN_SUBNET(192.168.0.0/24)" -action cs_act_Webwolf
#Binding CS policy to Content Switch
bind cs vserver gw.netscaler.dk -policyName cs_pol_Webgoat -priority 200
bind cs vserver gw.netscaler.dk -policyName cs_pol_Webwolf -priority 210
Webgoat – the unsecure webapplication
WebGoat is a deliberately insecure application that allows interested developers just like you to test vulnerabilities commonly found in Java-based applications, that use common and popular open source components.
Now, while we in no way condone causing intentional harm to any animal, goat or otherwise, we think learning everything you can about security vulnerabilities, is essential to understanding just what happens when even a small bit of unintended cod,e gets into your applications.
What better way to do that than with your very own scapegoat?
Feel free to do what you will with him. Hack, poke, prod and if it makes you feel better, scare him until your heart’s content. Go ahead and hack the goat. We promise he likes it.
If you want to learn more about Webgoat, please visit https://owasp.org/www-project-webgoat/ and remember this application is made to be hacked, so having external access to it, isn’t a good idea.
First look at webgoat
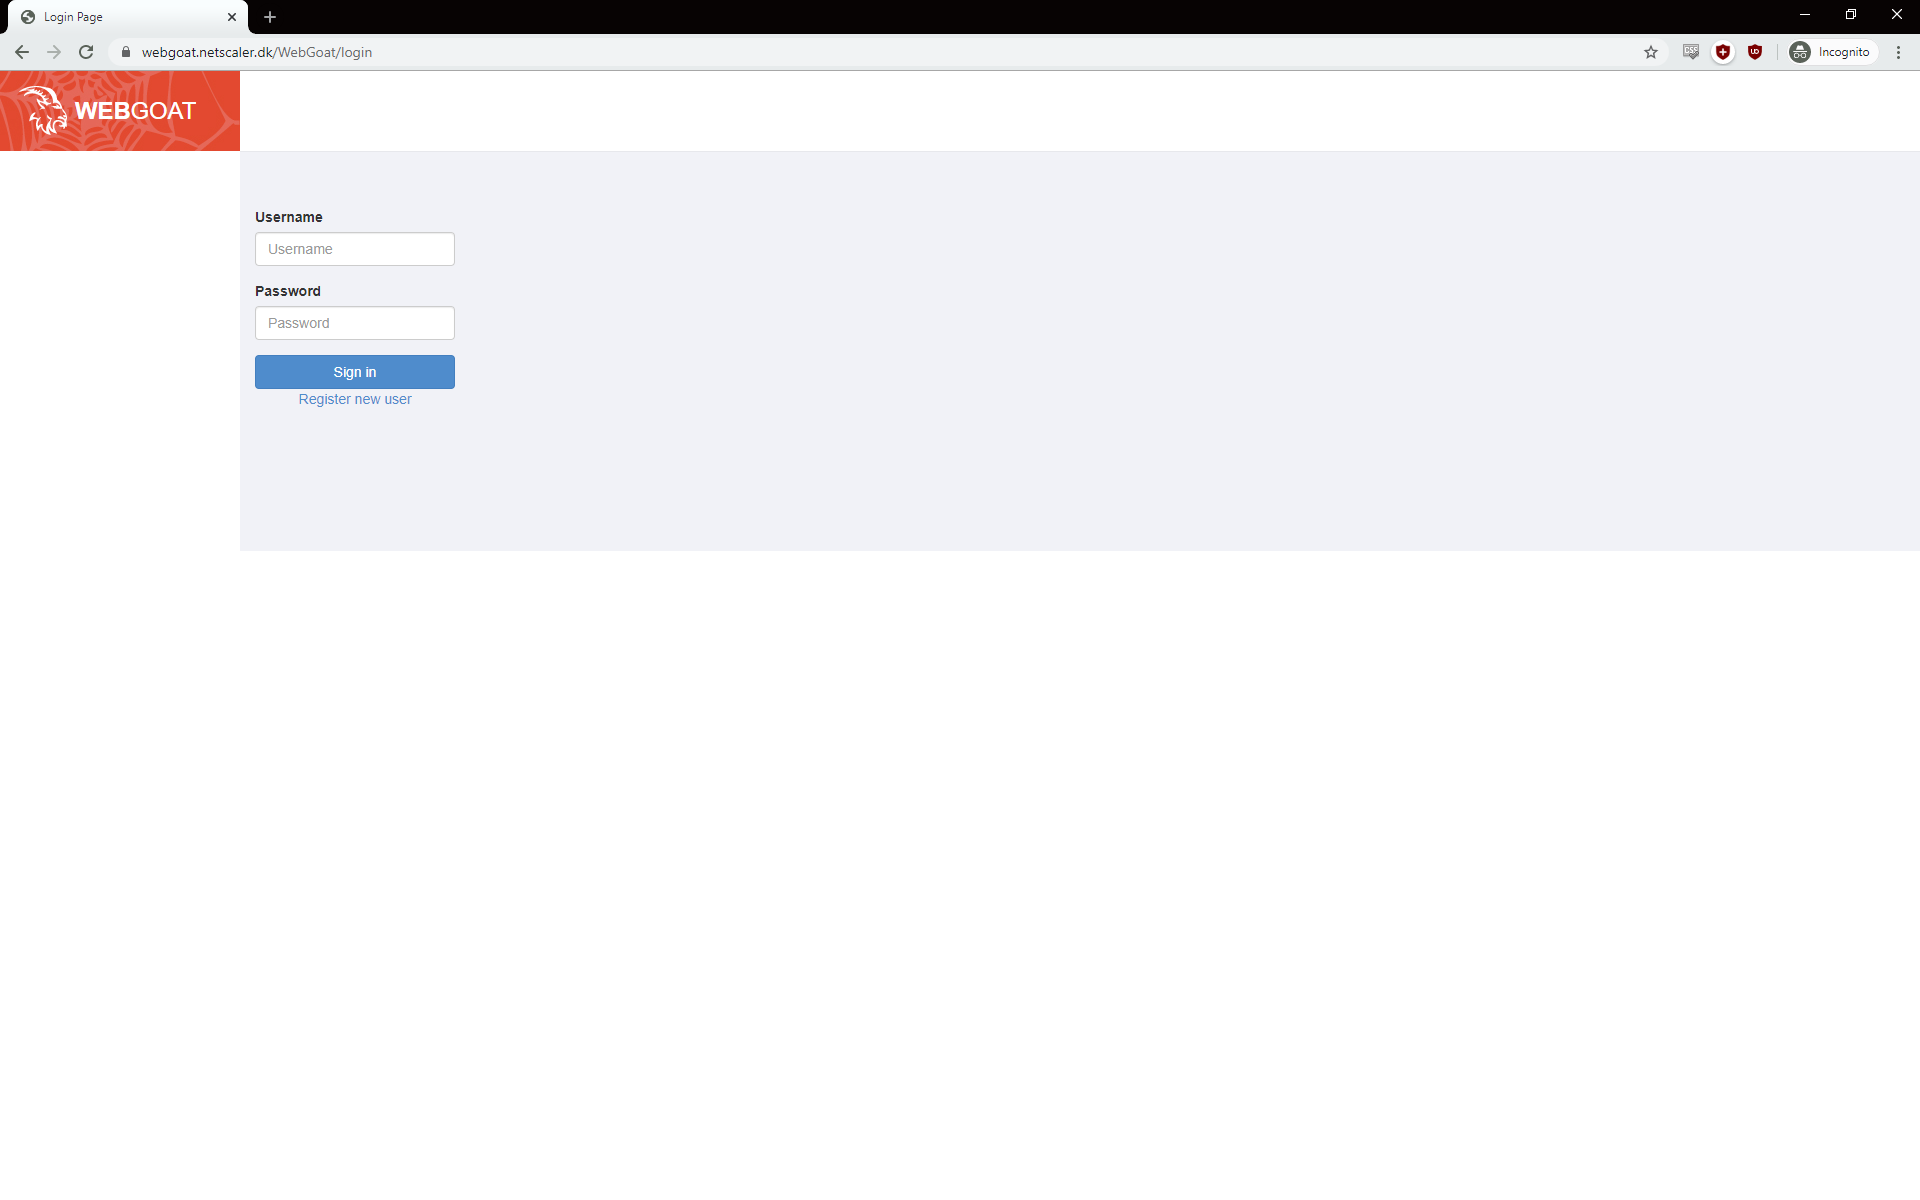
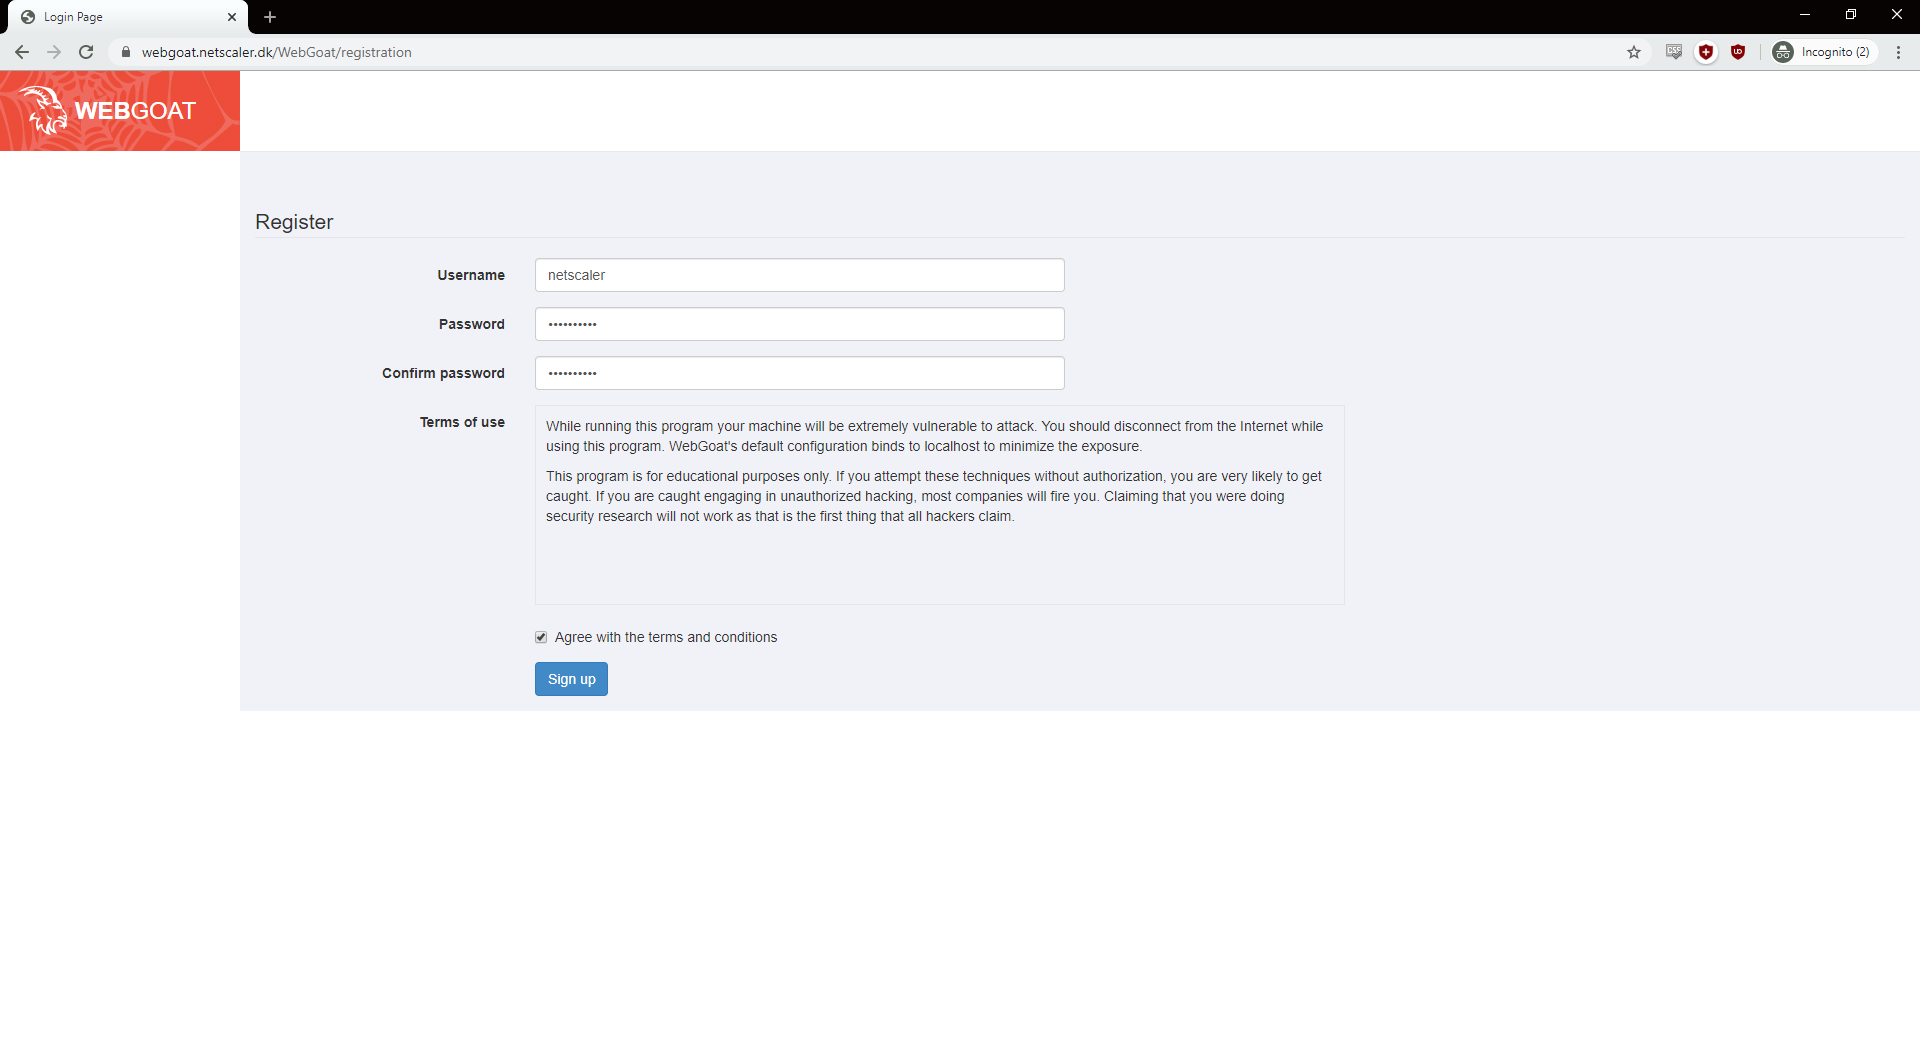
When you access webgoat for the first time, you must register a new user, so click the register new user.
Make sure the username is in lowercase and accept the terms and conditions.
Now you can log on using the newly created user and start to explore webgoat. There is a lot of good information in the general area.
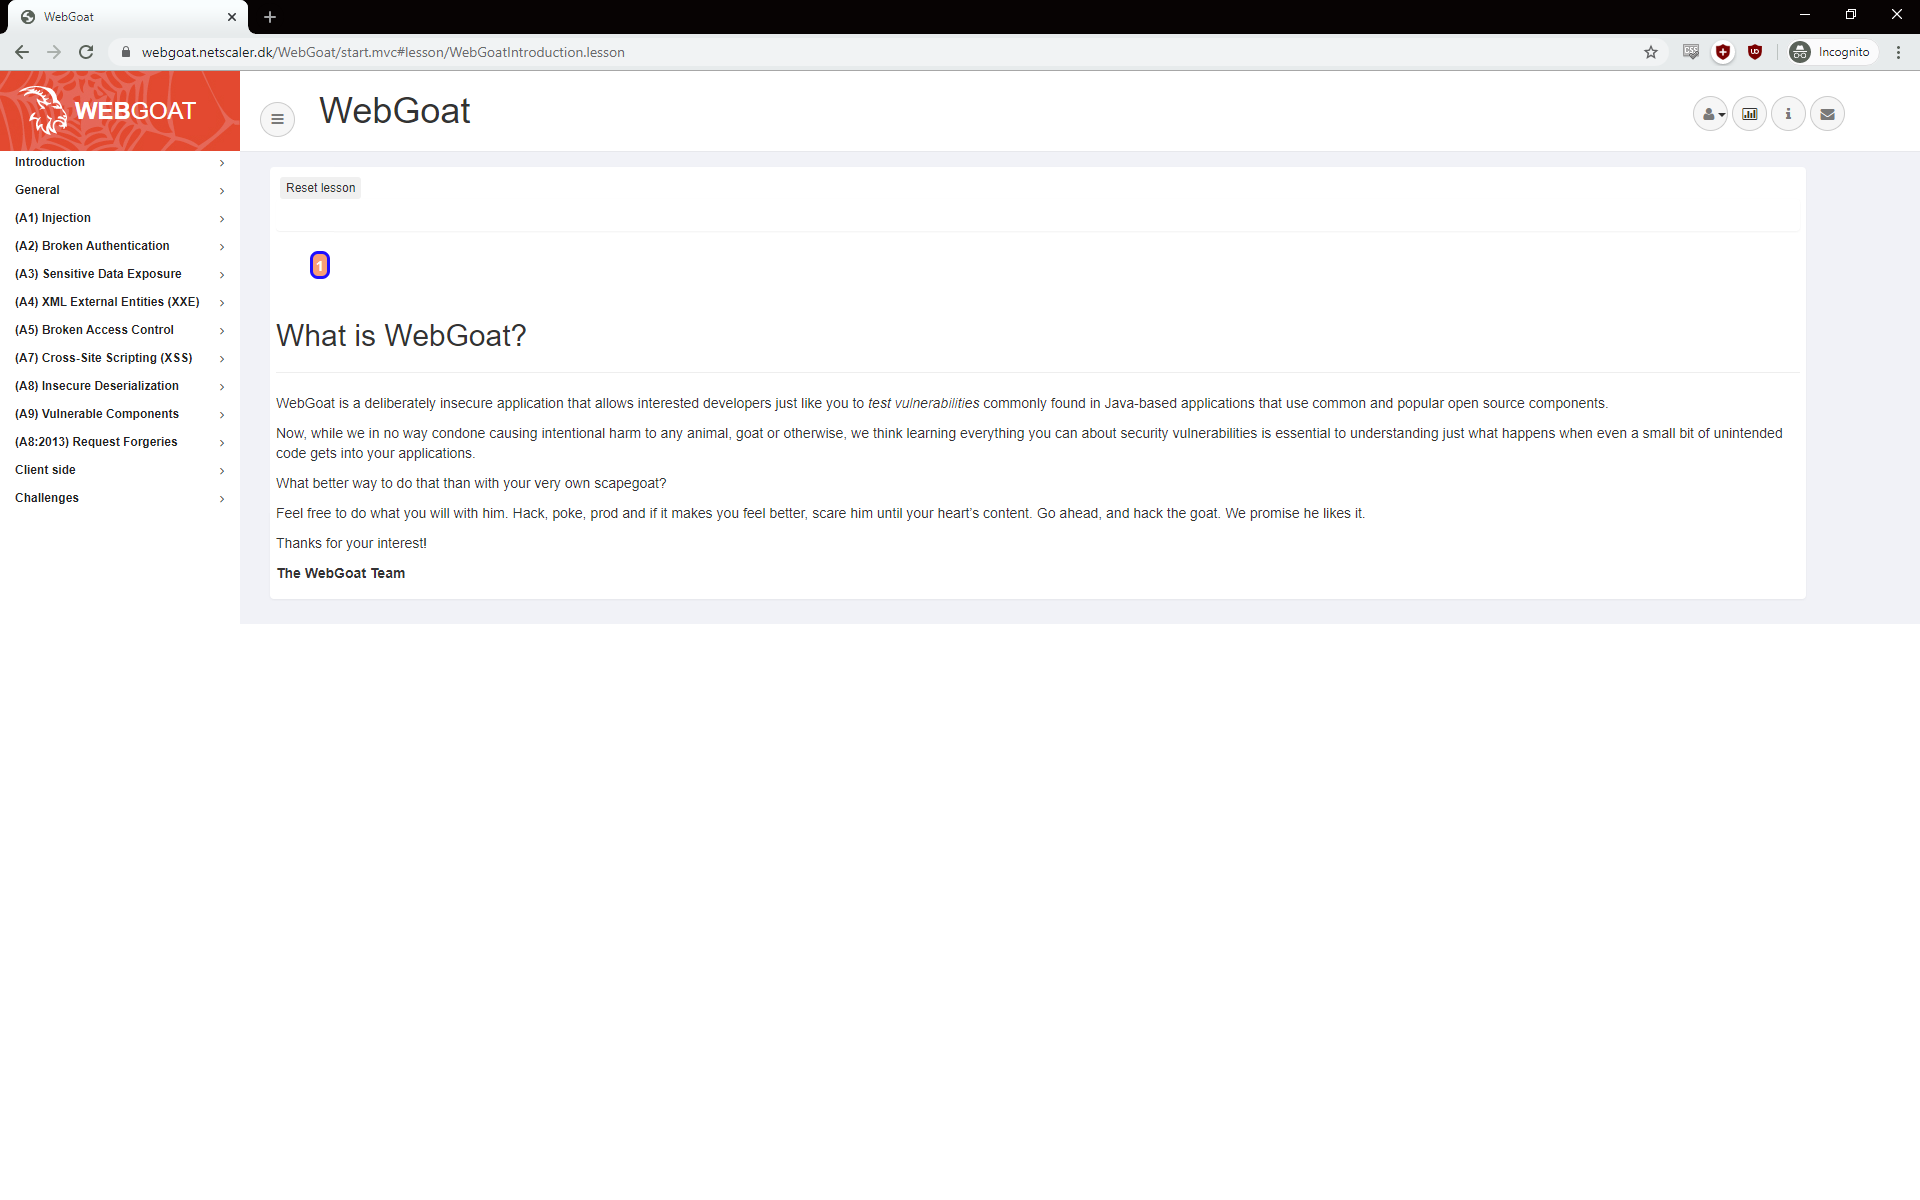
Let´s just jump directly into the first lession. It’s about injection and the focus for this first blog post, in the series.
There is of course a xkcd about injections.
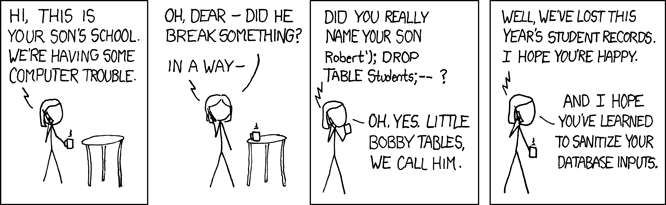
Credit: https://xkcd.com/327/
The first test is learning how to extract information from a database, that our web application is using.
They want us to retrieve the department of the employee Bob Franco, which can be done using a Select query, like SELECT department FROM employees WHERE first_name=’Bob’
The statement can be translated to: please tell me what department users with the first name Bob, in the table employees, is a member of.
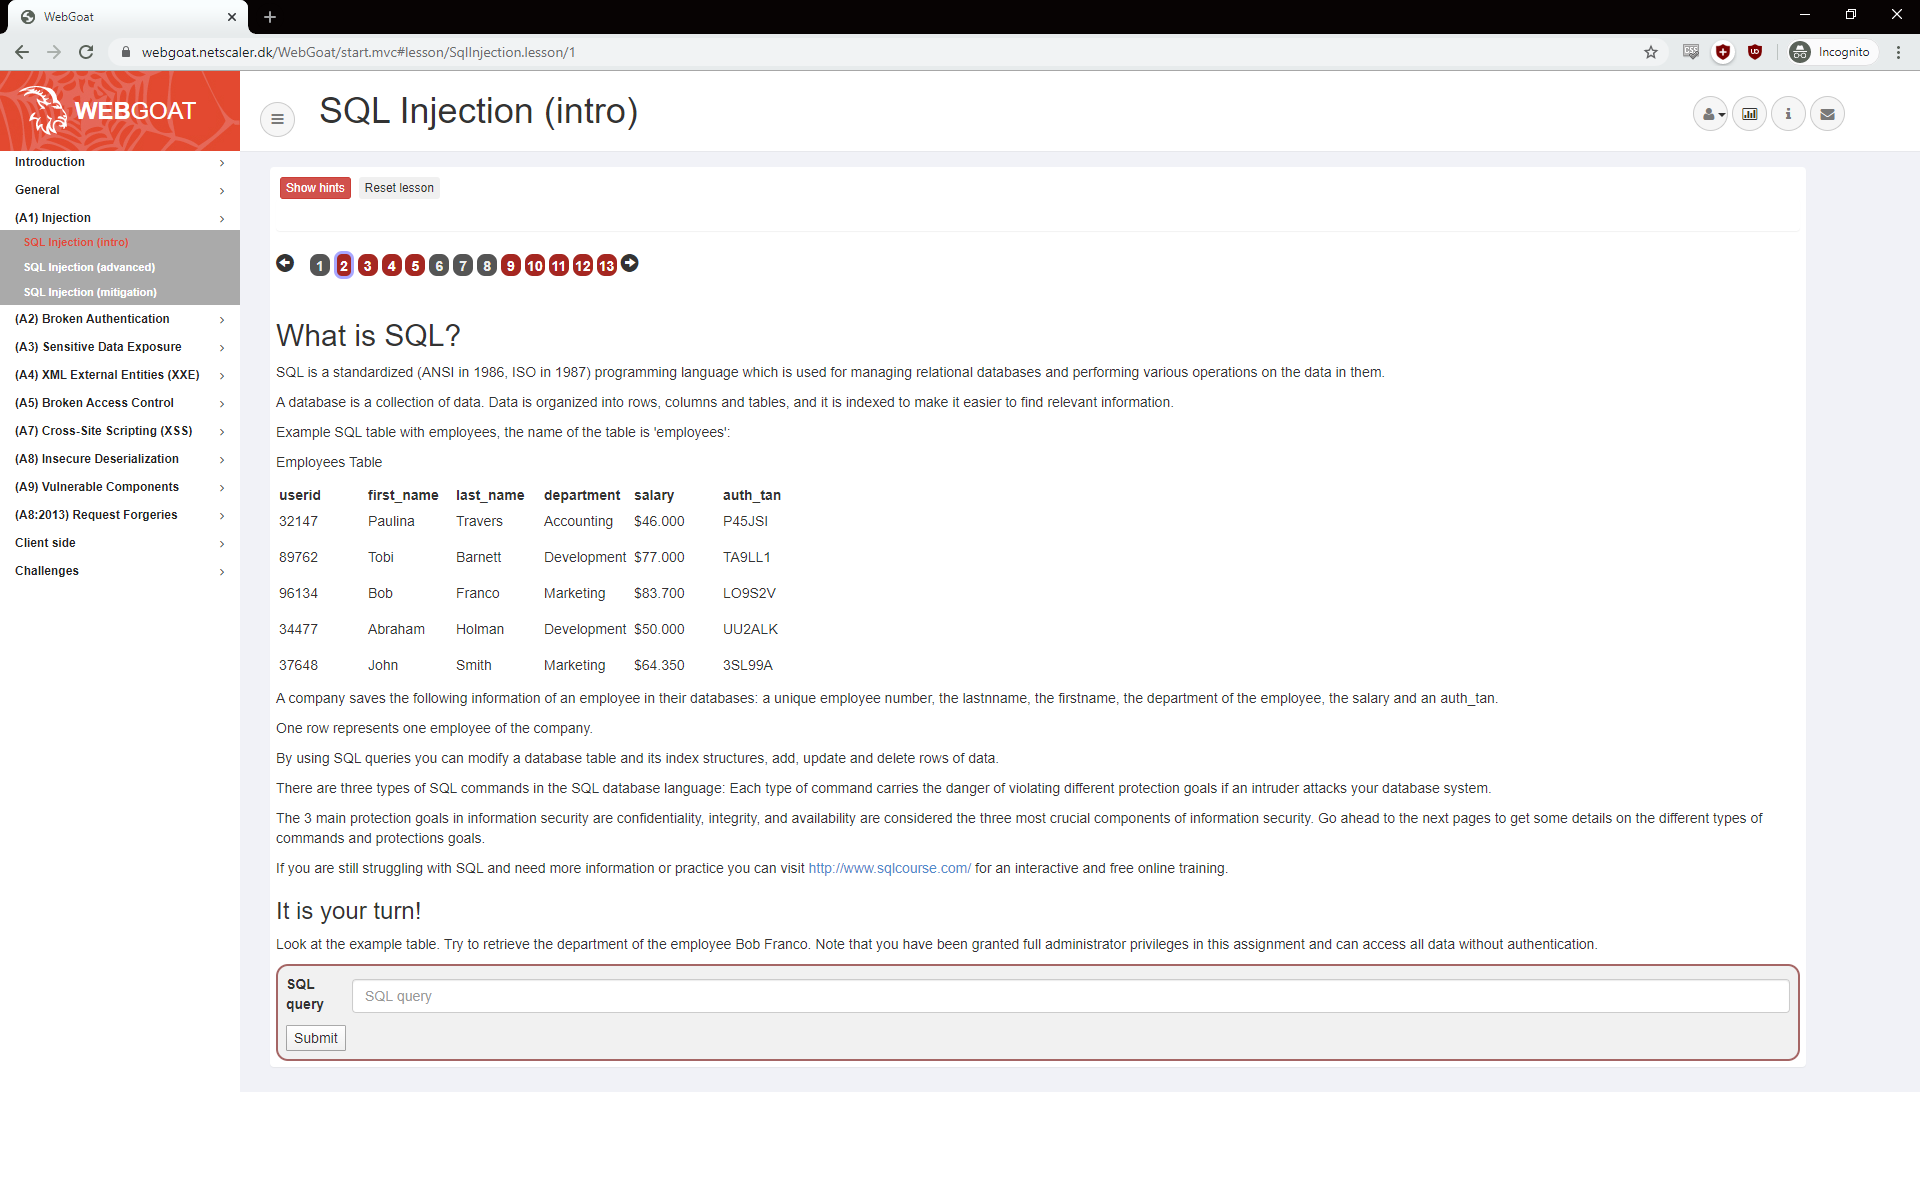
Our application got a nice form where we can submit our query, but it could a create user form, any input or query directly in the URL. How often have you seen something like ?id=5 in the URL? You could try to append your statement directly to the URL
Our statement returns the “Marketing” department. 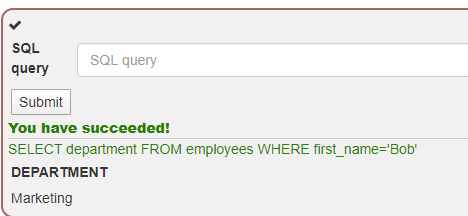
Great success, our insecure webapplication is insecure.
If we look with Inspect in our Chrome, we can see the query is sent.

Citrix ADC AppFW
To help against web attacks, there is a function on the ADC called Application firewall, which is a Premium licenses feature.
The App Firewall works by identifying pattern and behaviors in traffic. The simplest patterns are based on signatures. They can be found under Security – Citrix Web App firewall – Signatures
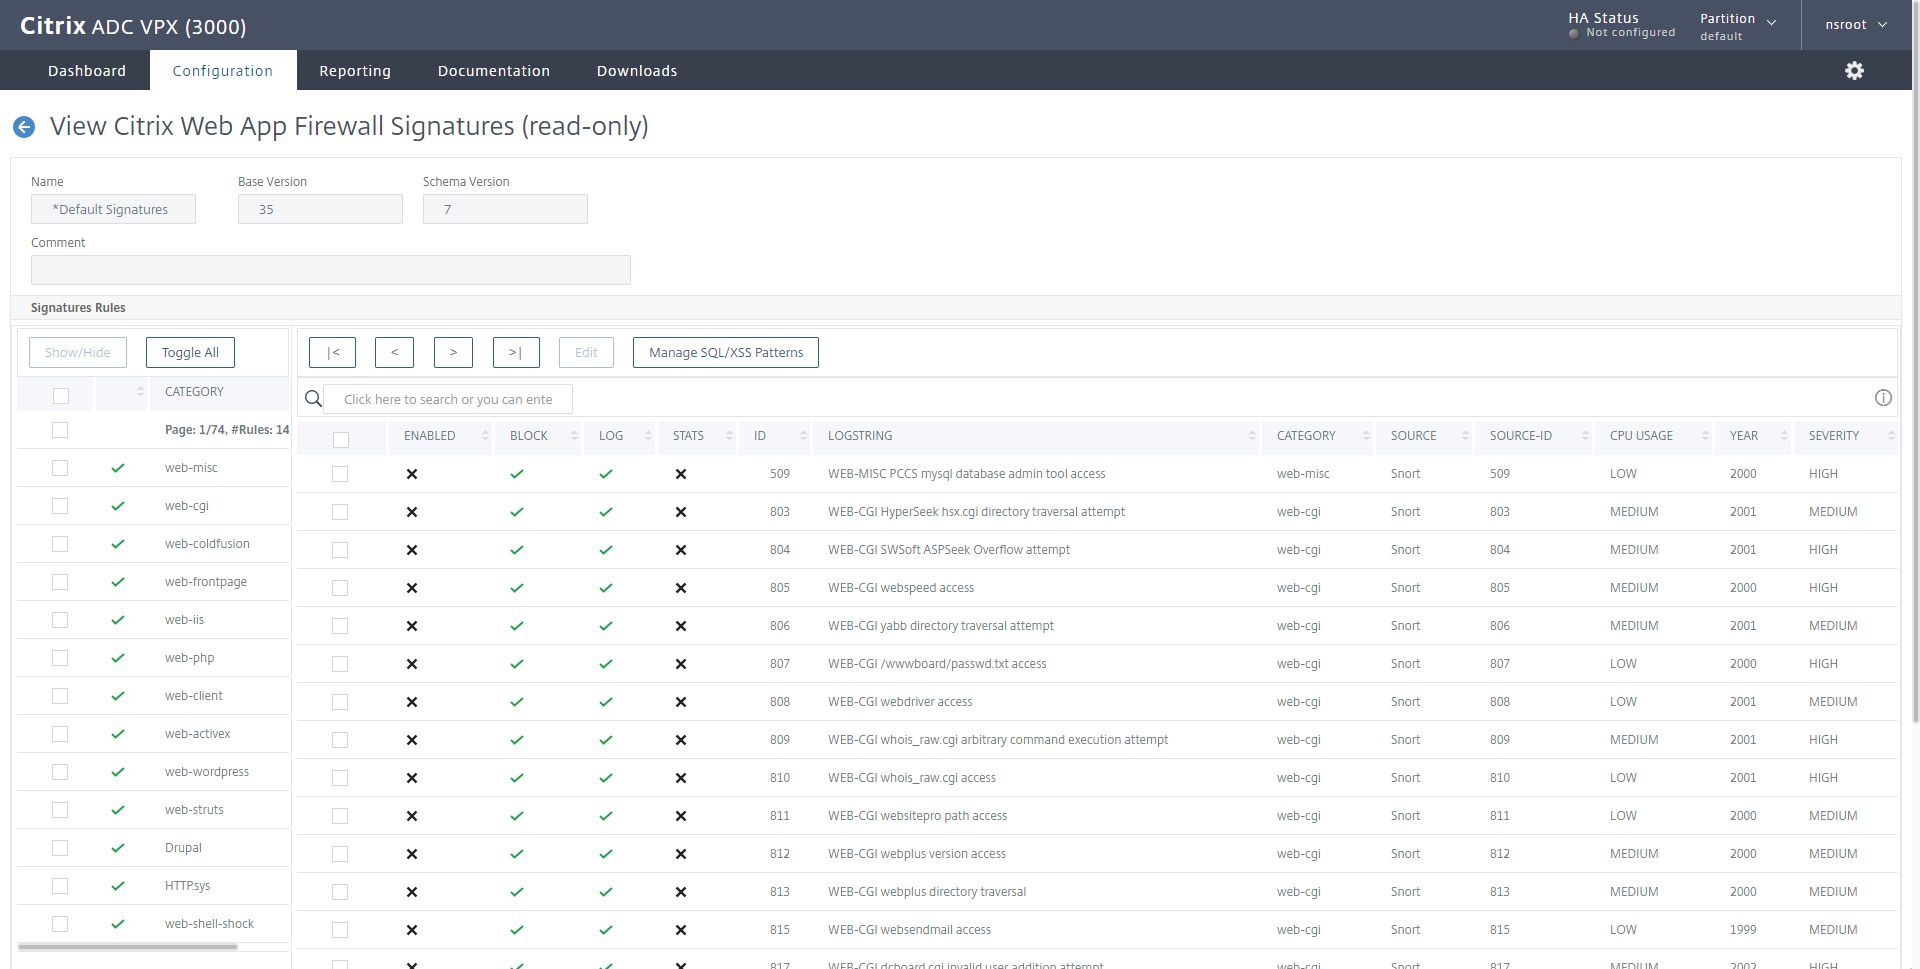
A signature is a string or a pattern that matches a known attack. The default signatures are derived from Snort (https://www.snort.org/), the ADC is able to use other lists if they are converted to XSLT files, which is the format the ADC supports.
The signatures can be updated by allowing the NSIP to contact Amazon AWS and a working DNS on the ADC. Now personally I don’t recommend allowing your NSIP to reach the internet. I would recommend you to setup a local webserver, and make it update from there.
Configuration
To start with, I will create an appfw profile and policy that will log our sql injection attack. It’s a good idea to start with logging, because appfw can break web sites, that are doing something not common.
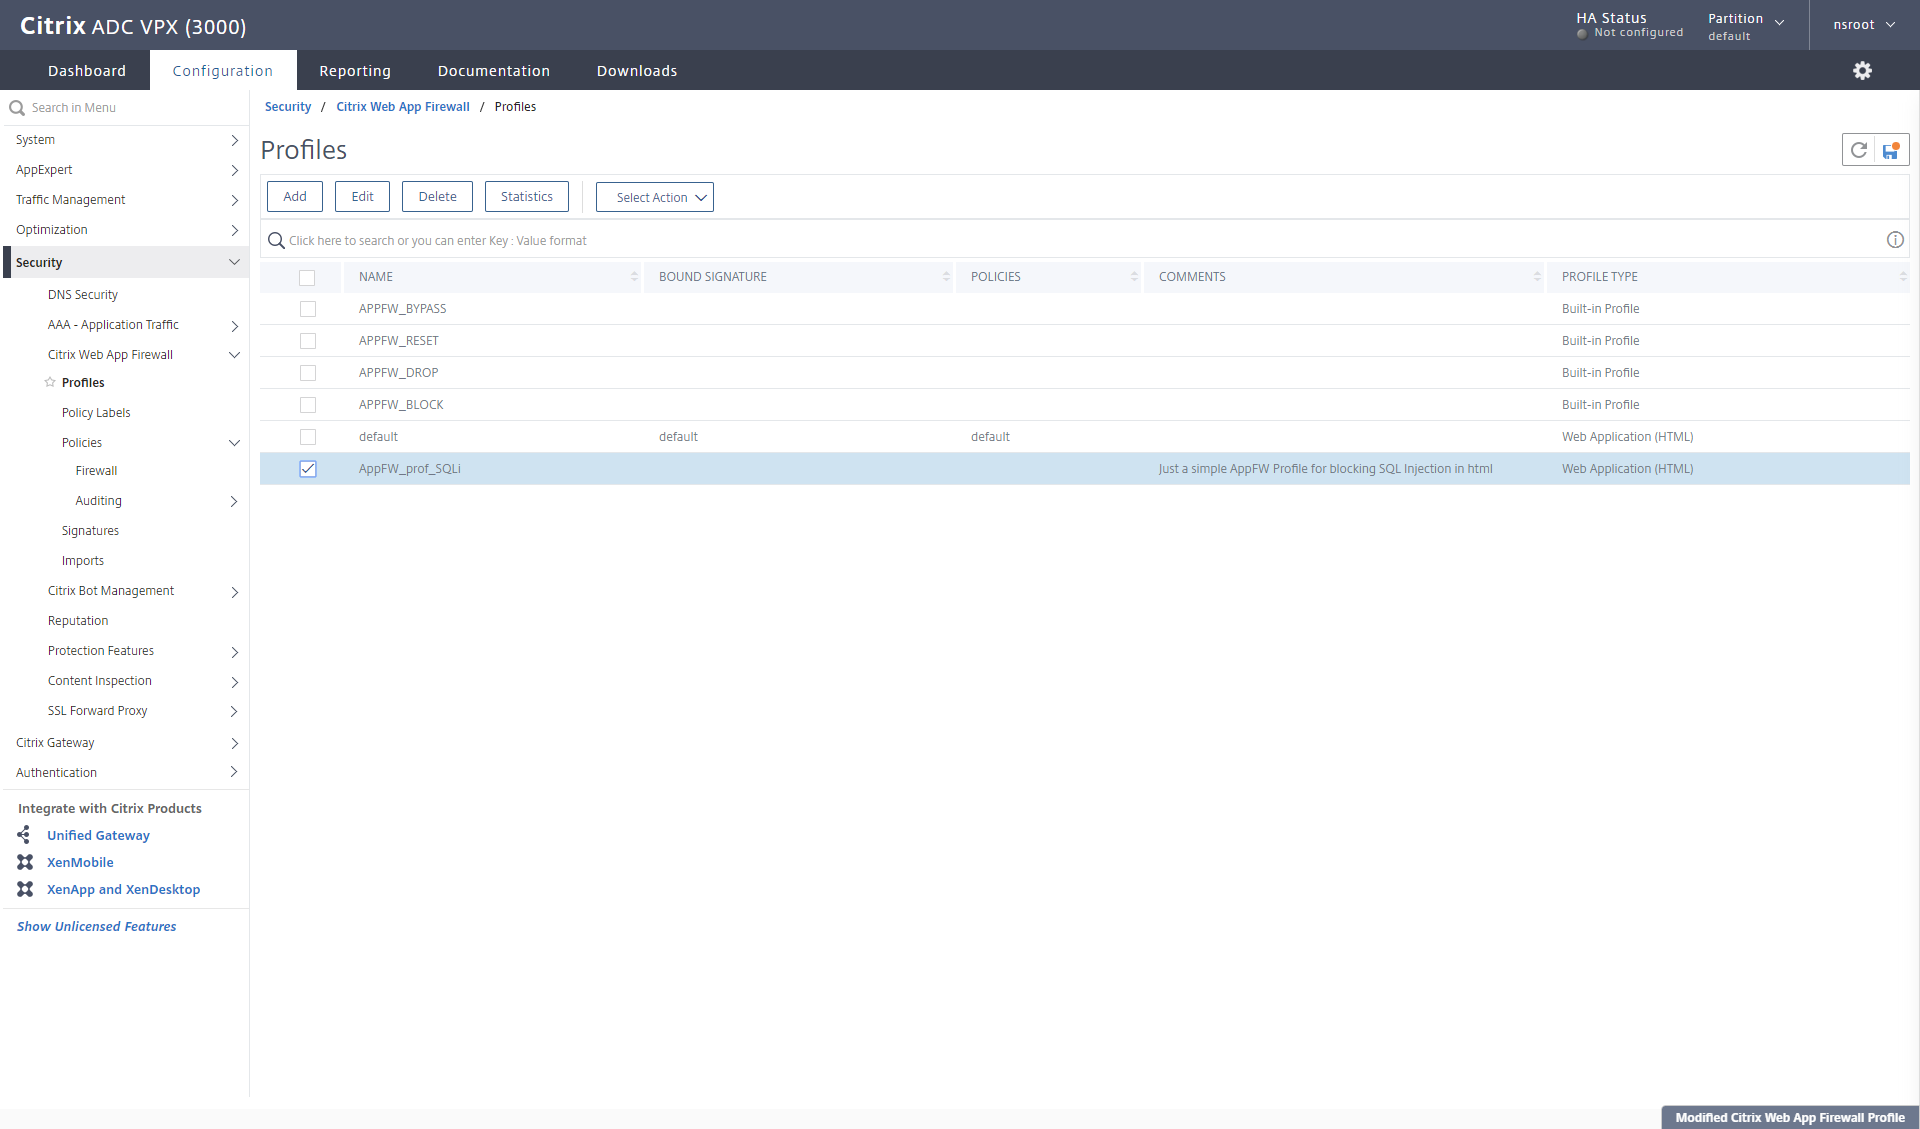
On my ADC I go the Security section and find Citrix Web app Firewall – Profiles
The profile is the collection of prevention methods we will use.
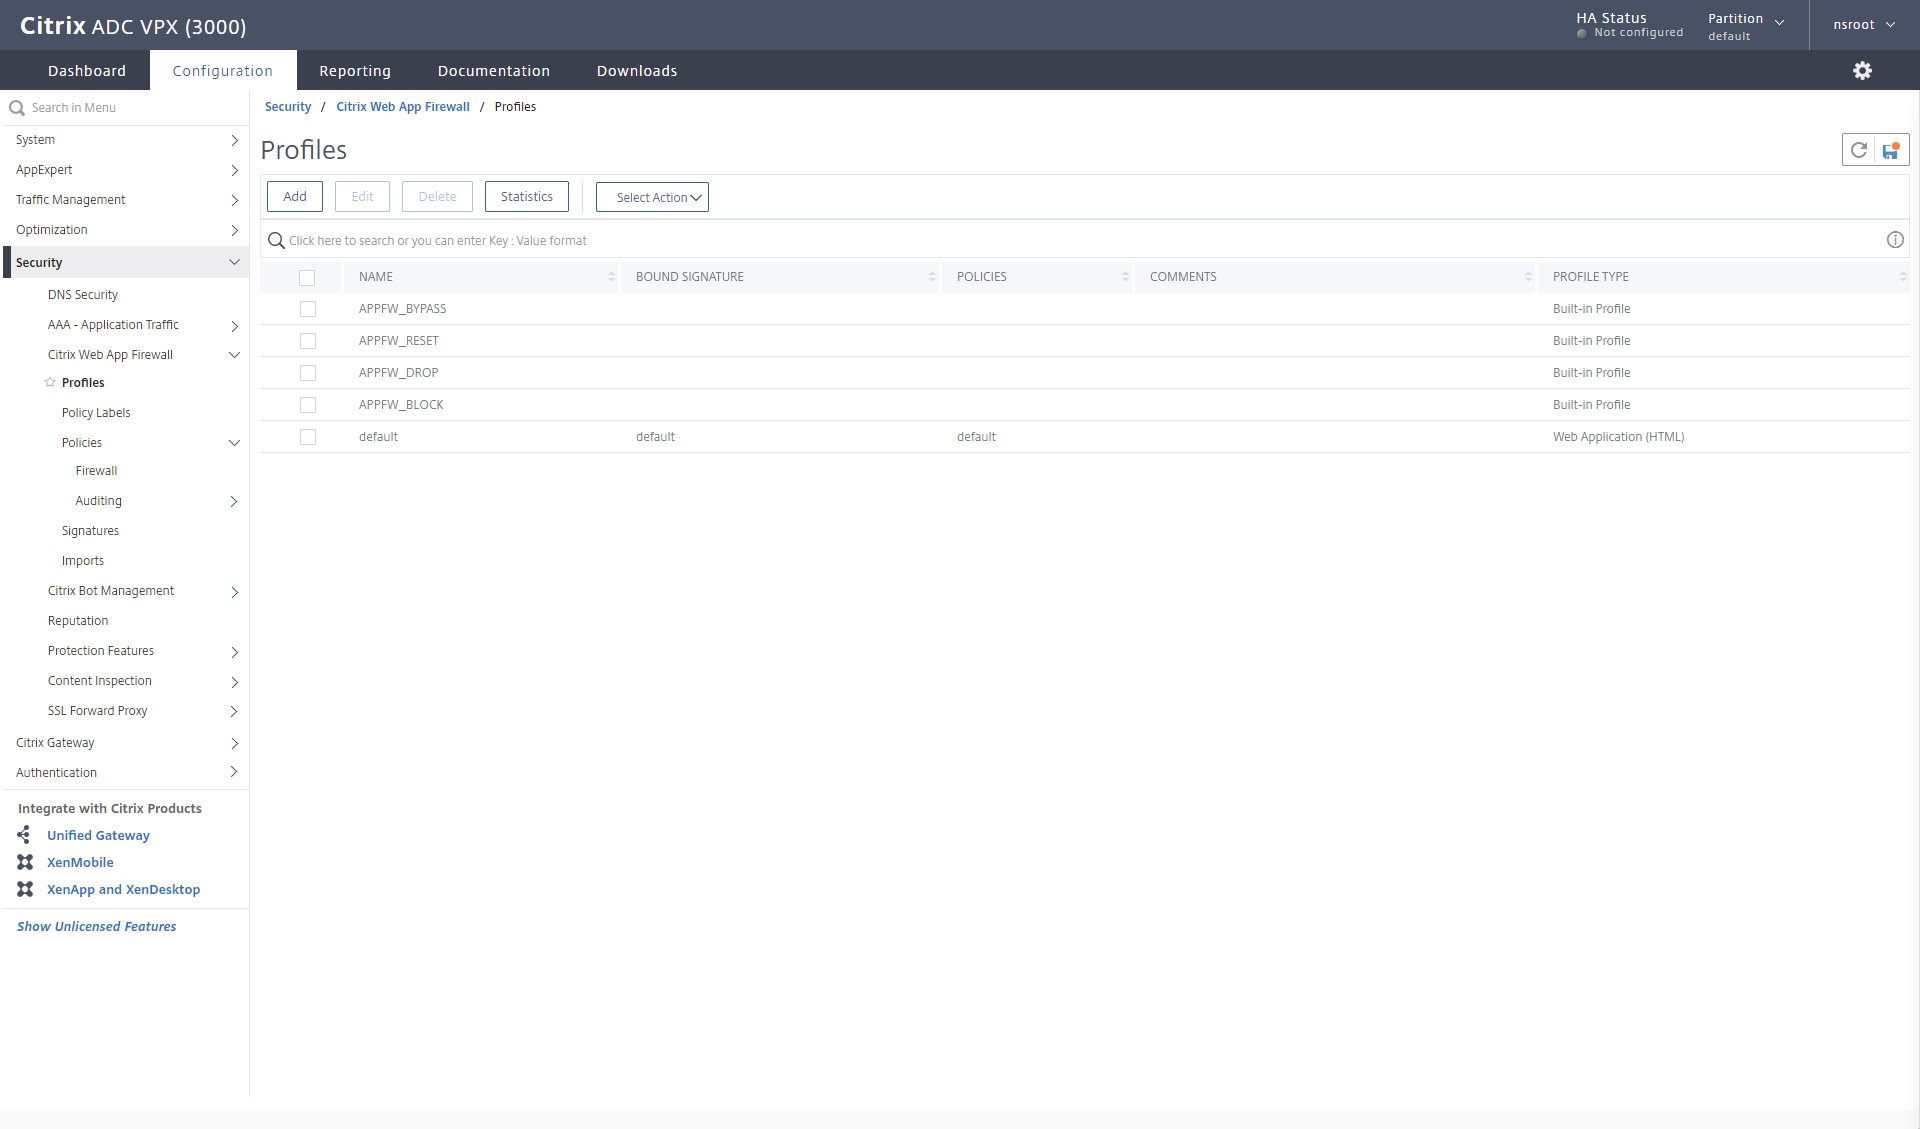
When you add the profile, you must know something about the web application, you’re going to protect.
Is a basic html application, a more web2.0 application (xml, soap) or json
For our little SQL blocking, a normal Web Application is enough (But the more ticks you make here, the more features you can enable in the profile, when we edit it)
I give it a name. I always use the naming methodology og appfw_profile_xxx (this could be the name of webapp, the function we’re protection against)
In this example it’s AppFW_prof_SQLi. Select Web application (html) and give it a comment, once you click OK, you get sent back to the previous screen. Next we have to edit it.

I select my newly created profile and edit it (I’ve put in a feature request, that we should be able to edit, when we create it)
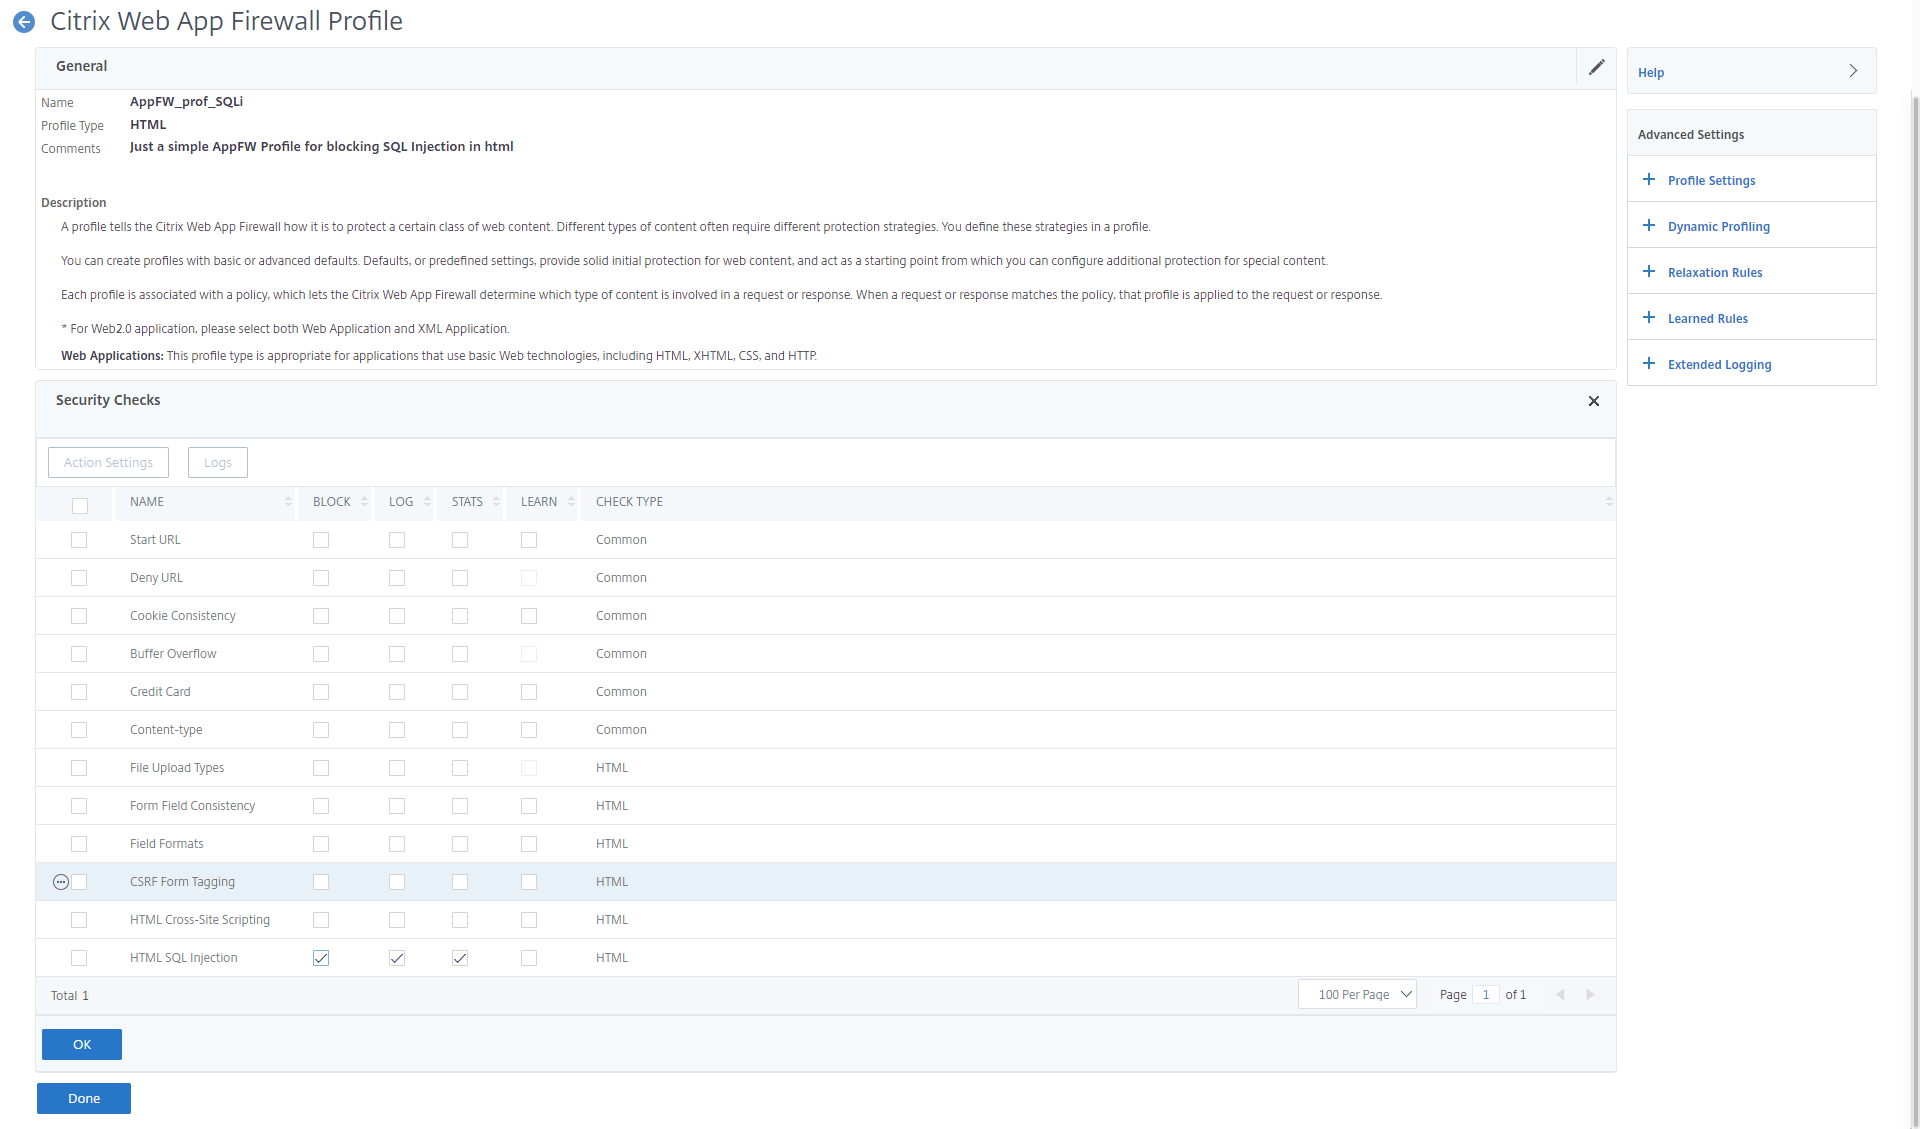
When I open my profile, I select Security checks in the right panel, this will be the different areas we want to look at. A default policy looks like this.
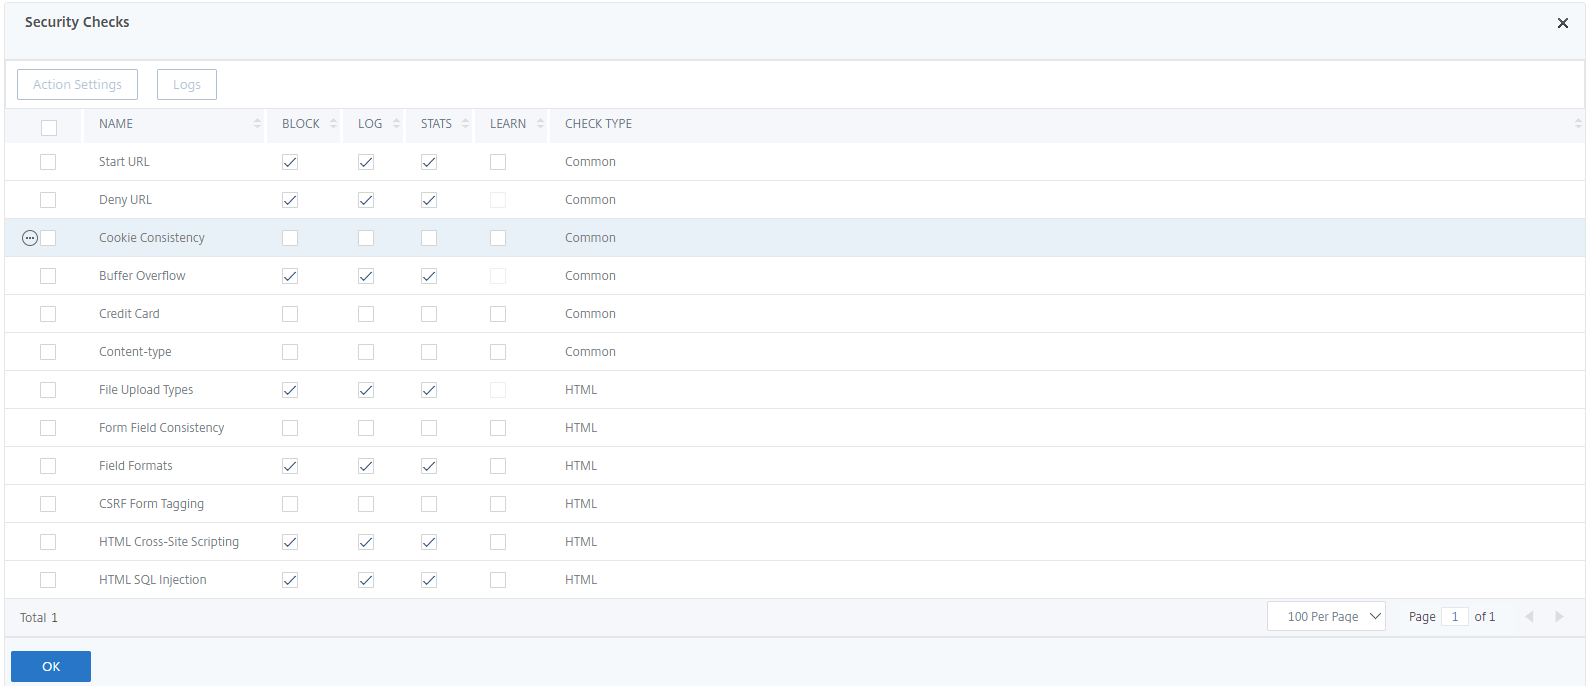
I’ve removed the check marks on everything, except LOG and STATS on the HTML SQL Injection area, because I only want to focus on that part now. 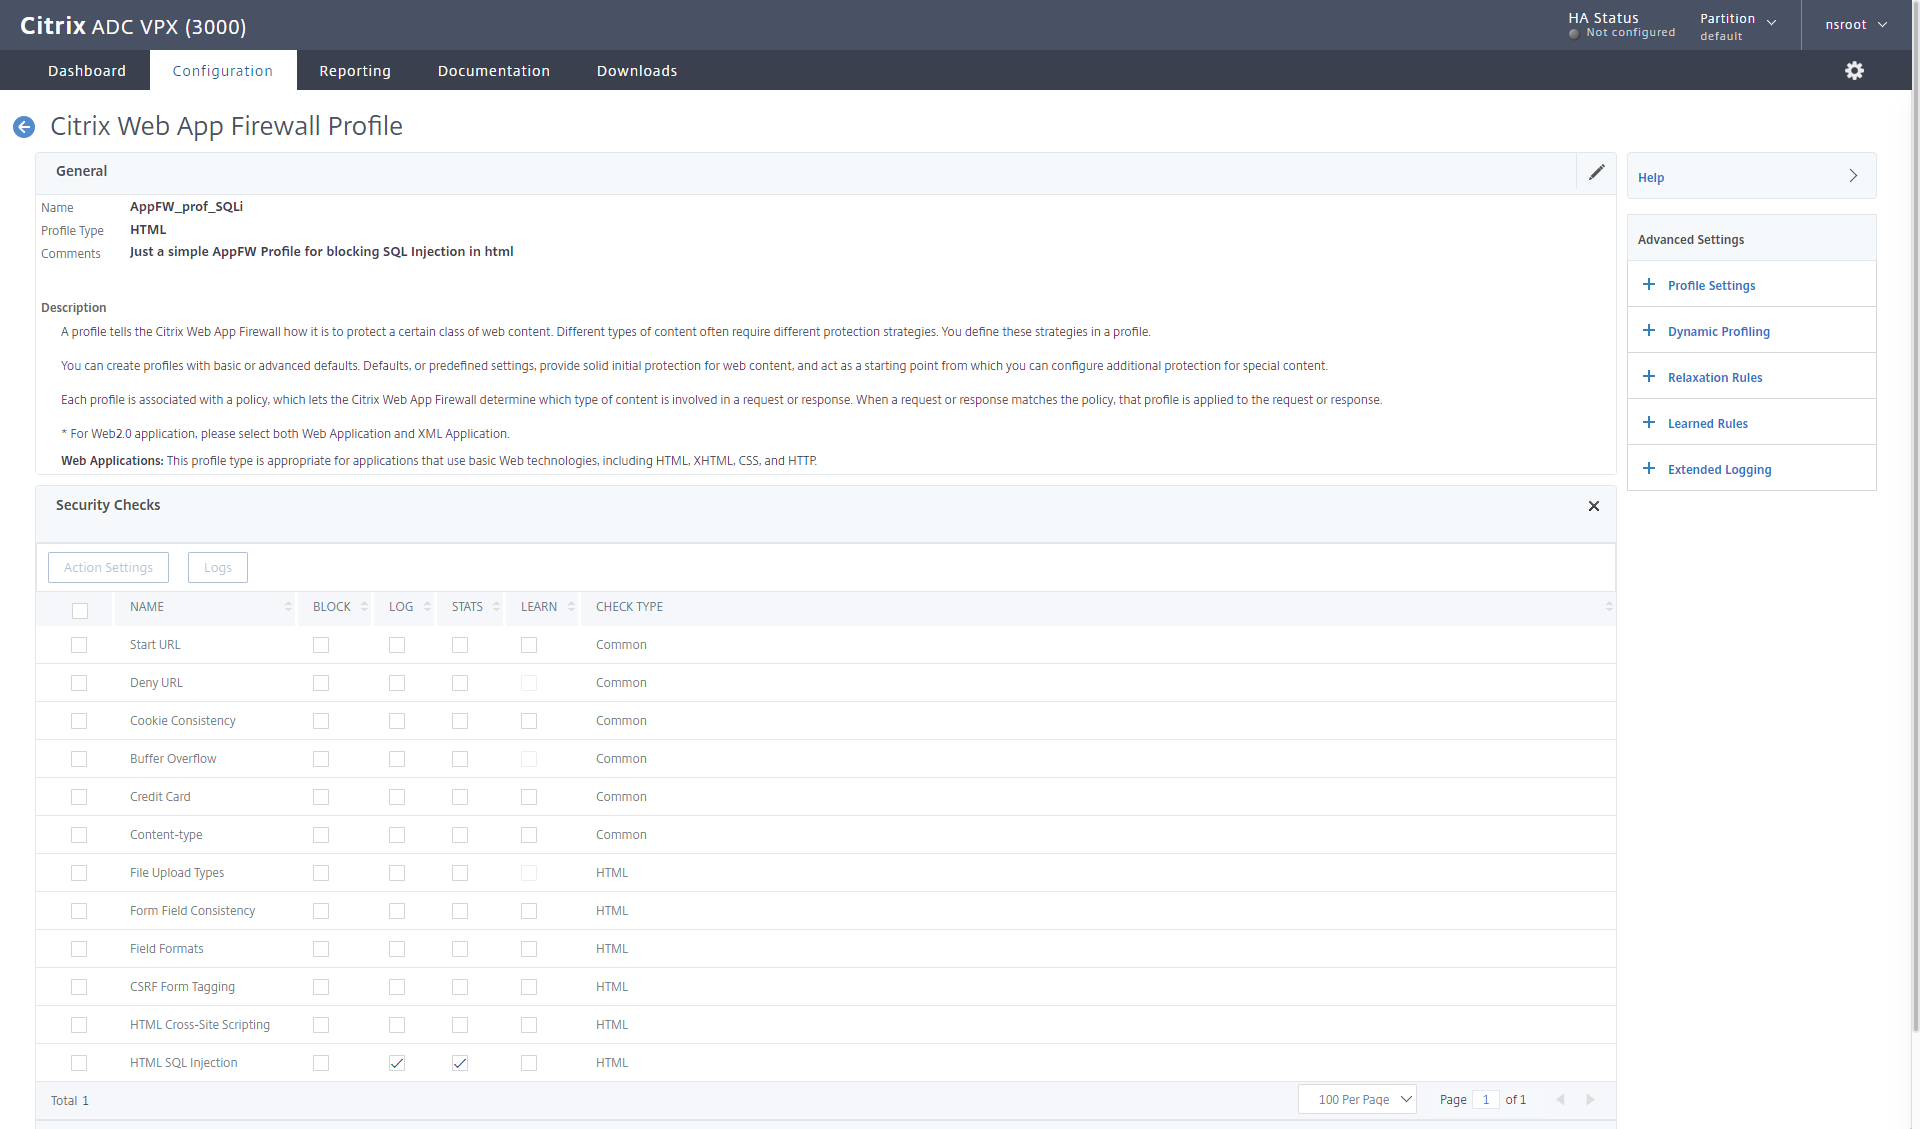
Next we have to create a policy (Remember that on the ADC there is policy that evaluates data, like a http request, response, client IP, destination port, source port and so forth) which then calls a profile that can apply an action.
I switch to the Policies – Firewall section in the Citrix Web app firewall, and add a new one.
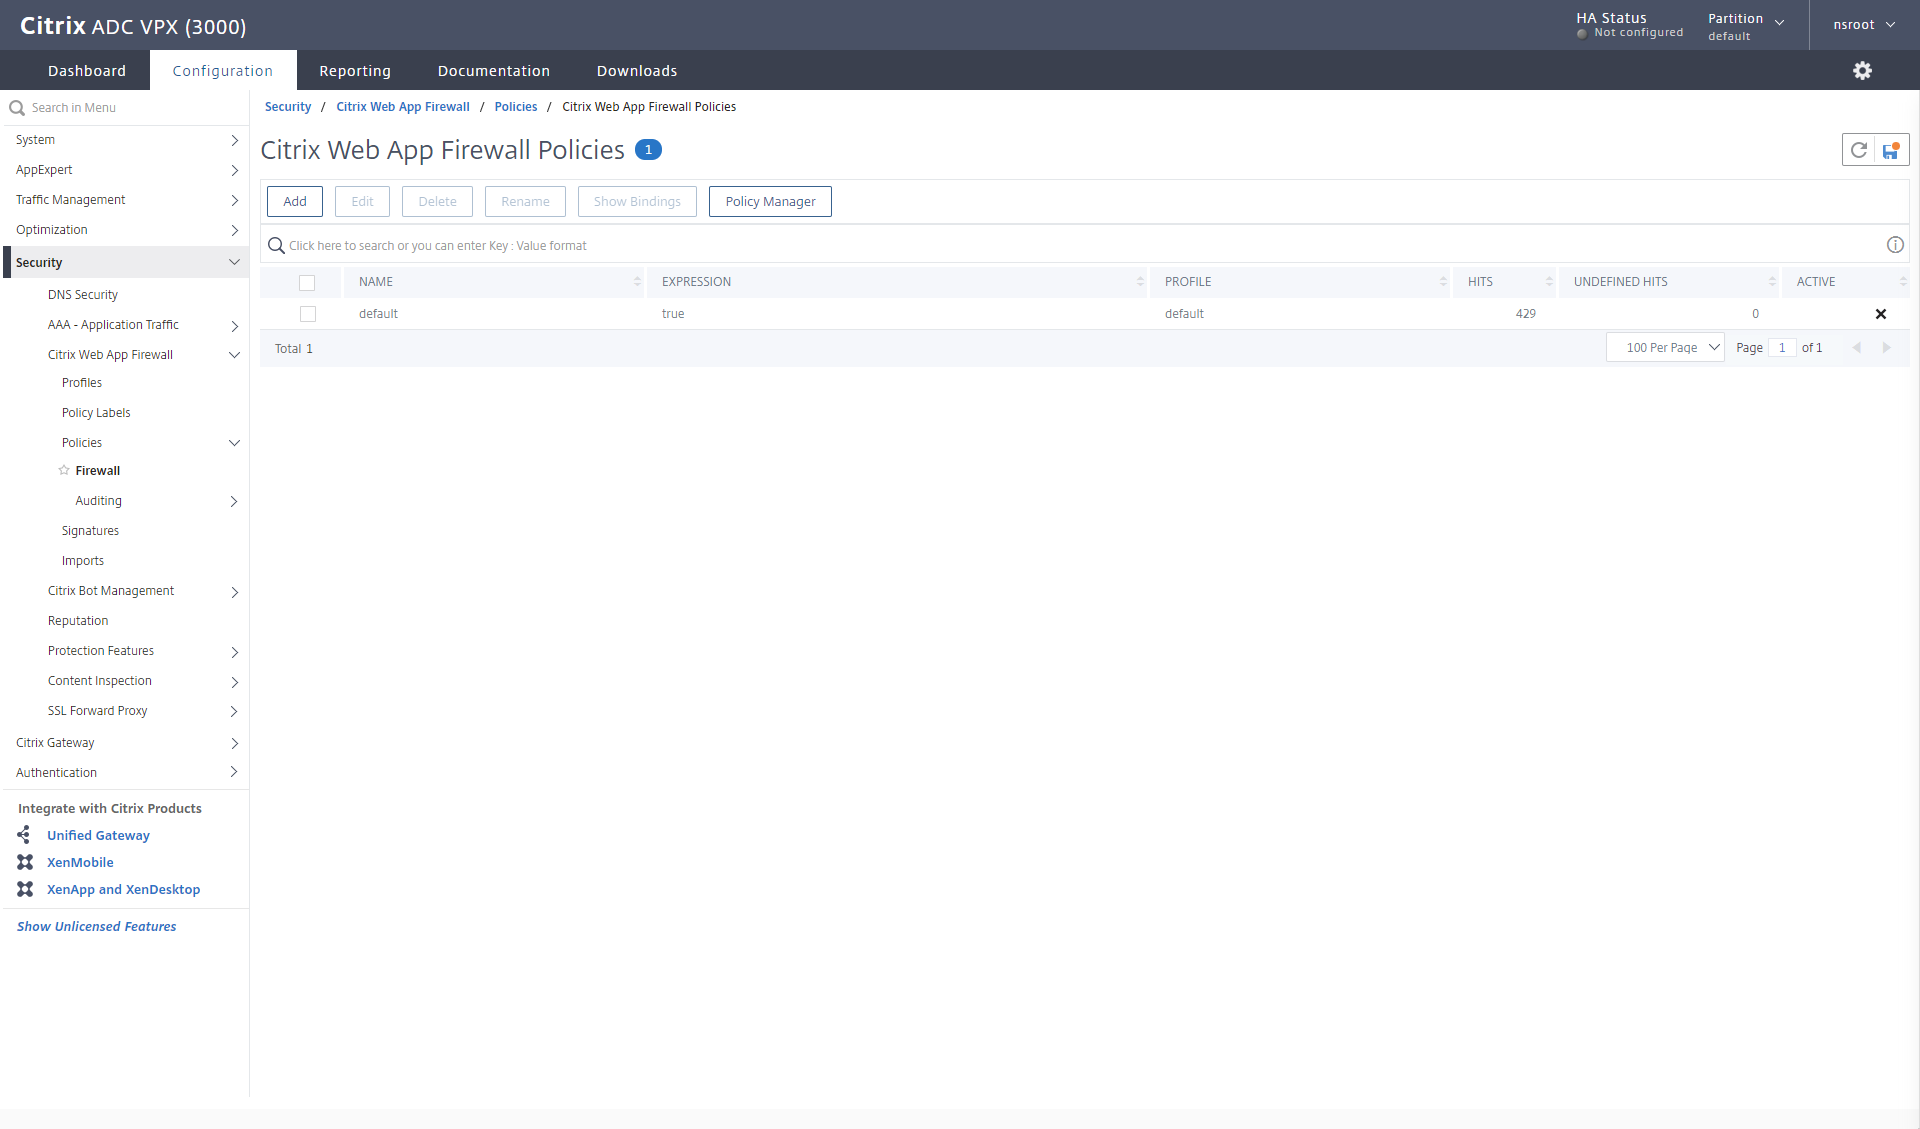
My naming methodology here is AppFW_pol_XXX. This policy is appfw_pol_sqli, it points to my profile AppFW_prof_SQLi and the expression is true (which is an advanced policy compared to the old classic policies of ns_true), telling the ADC to always execute the profile, and I give it a comment. 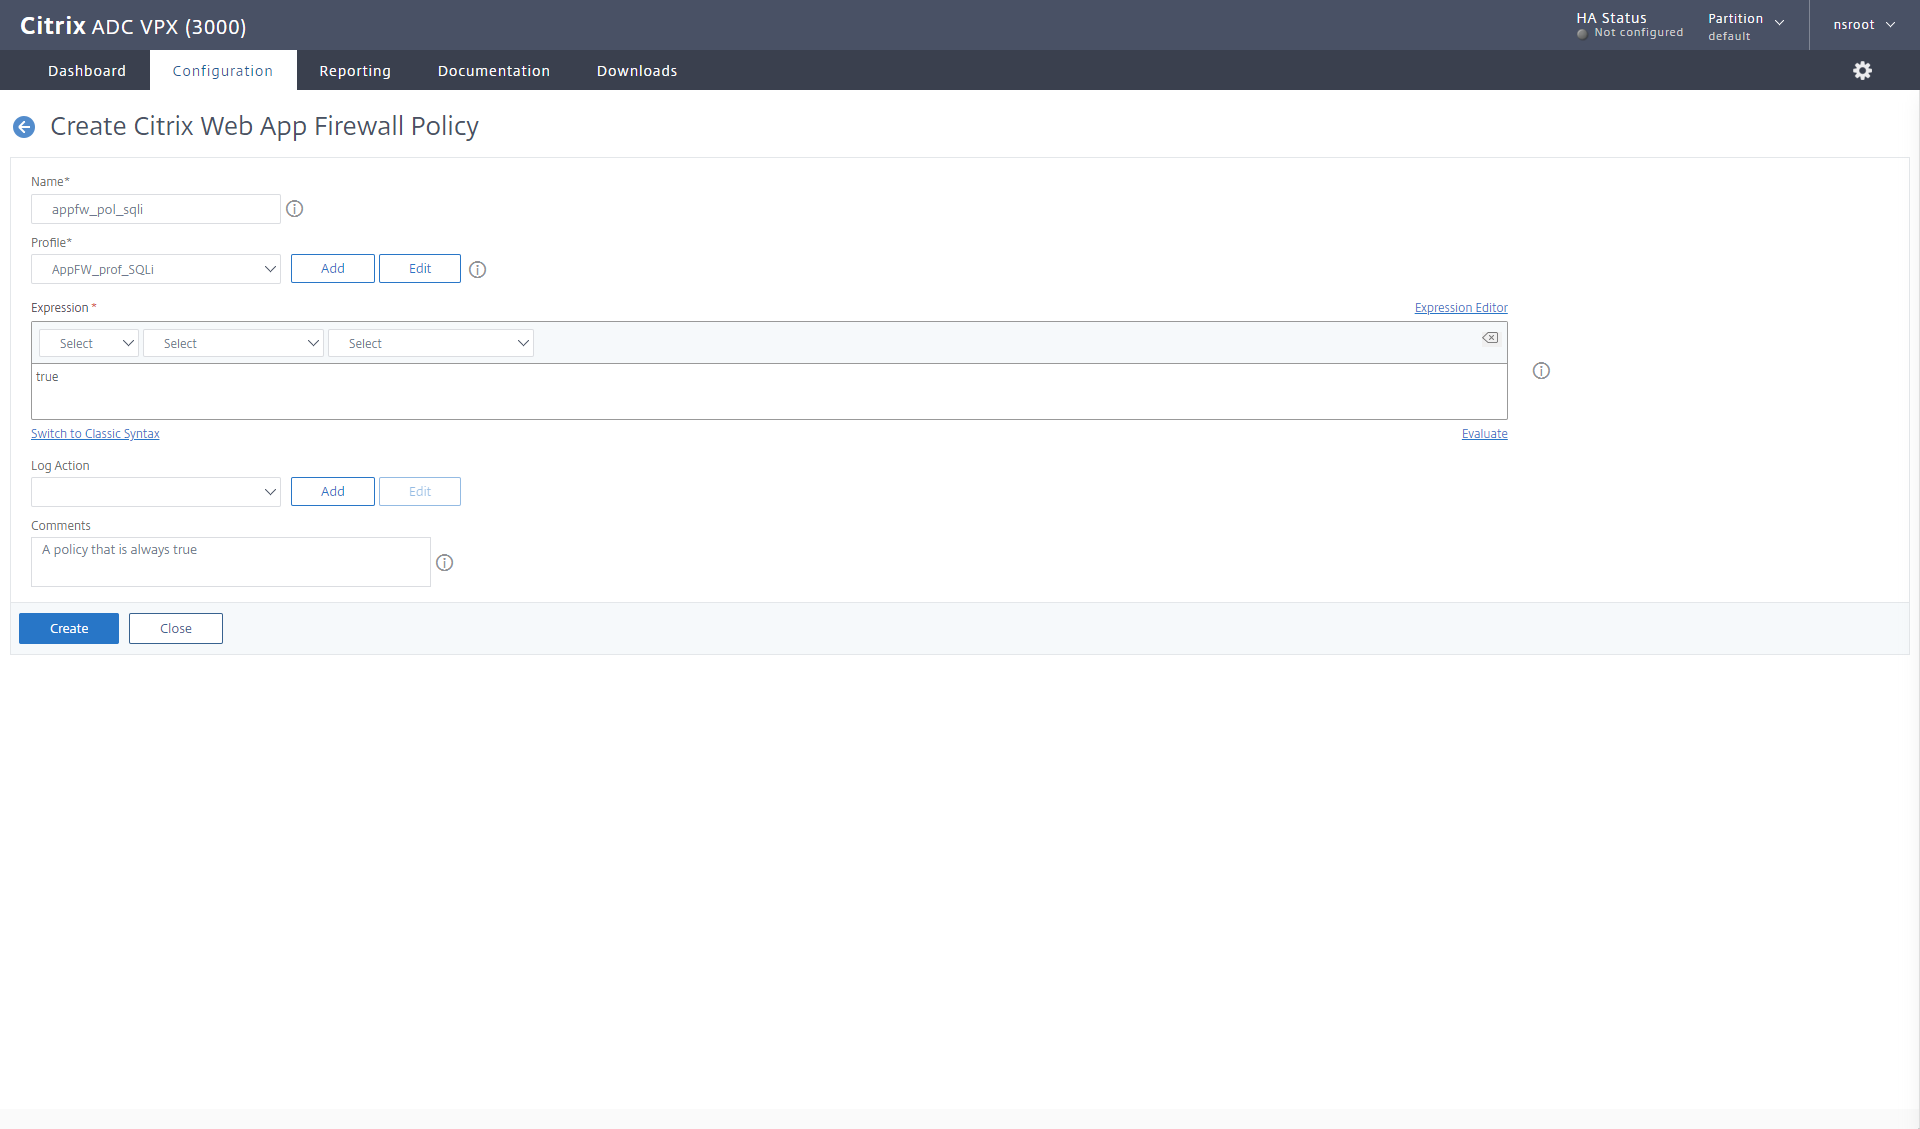
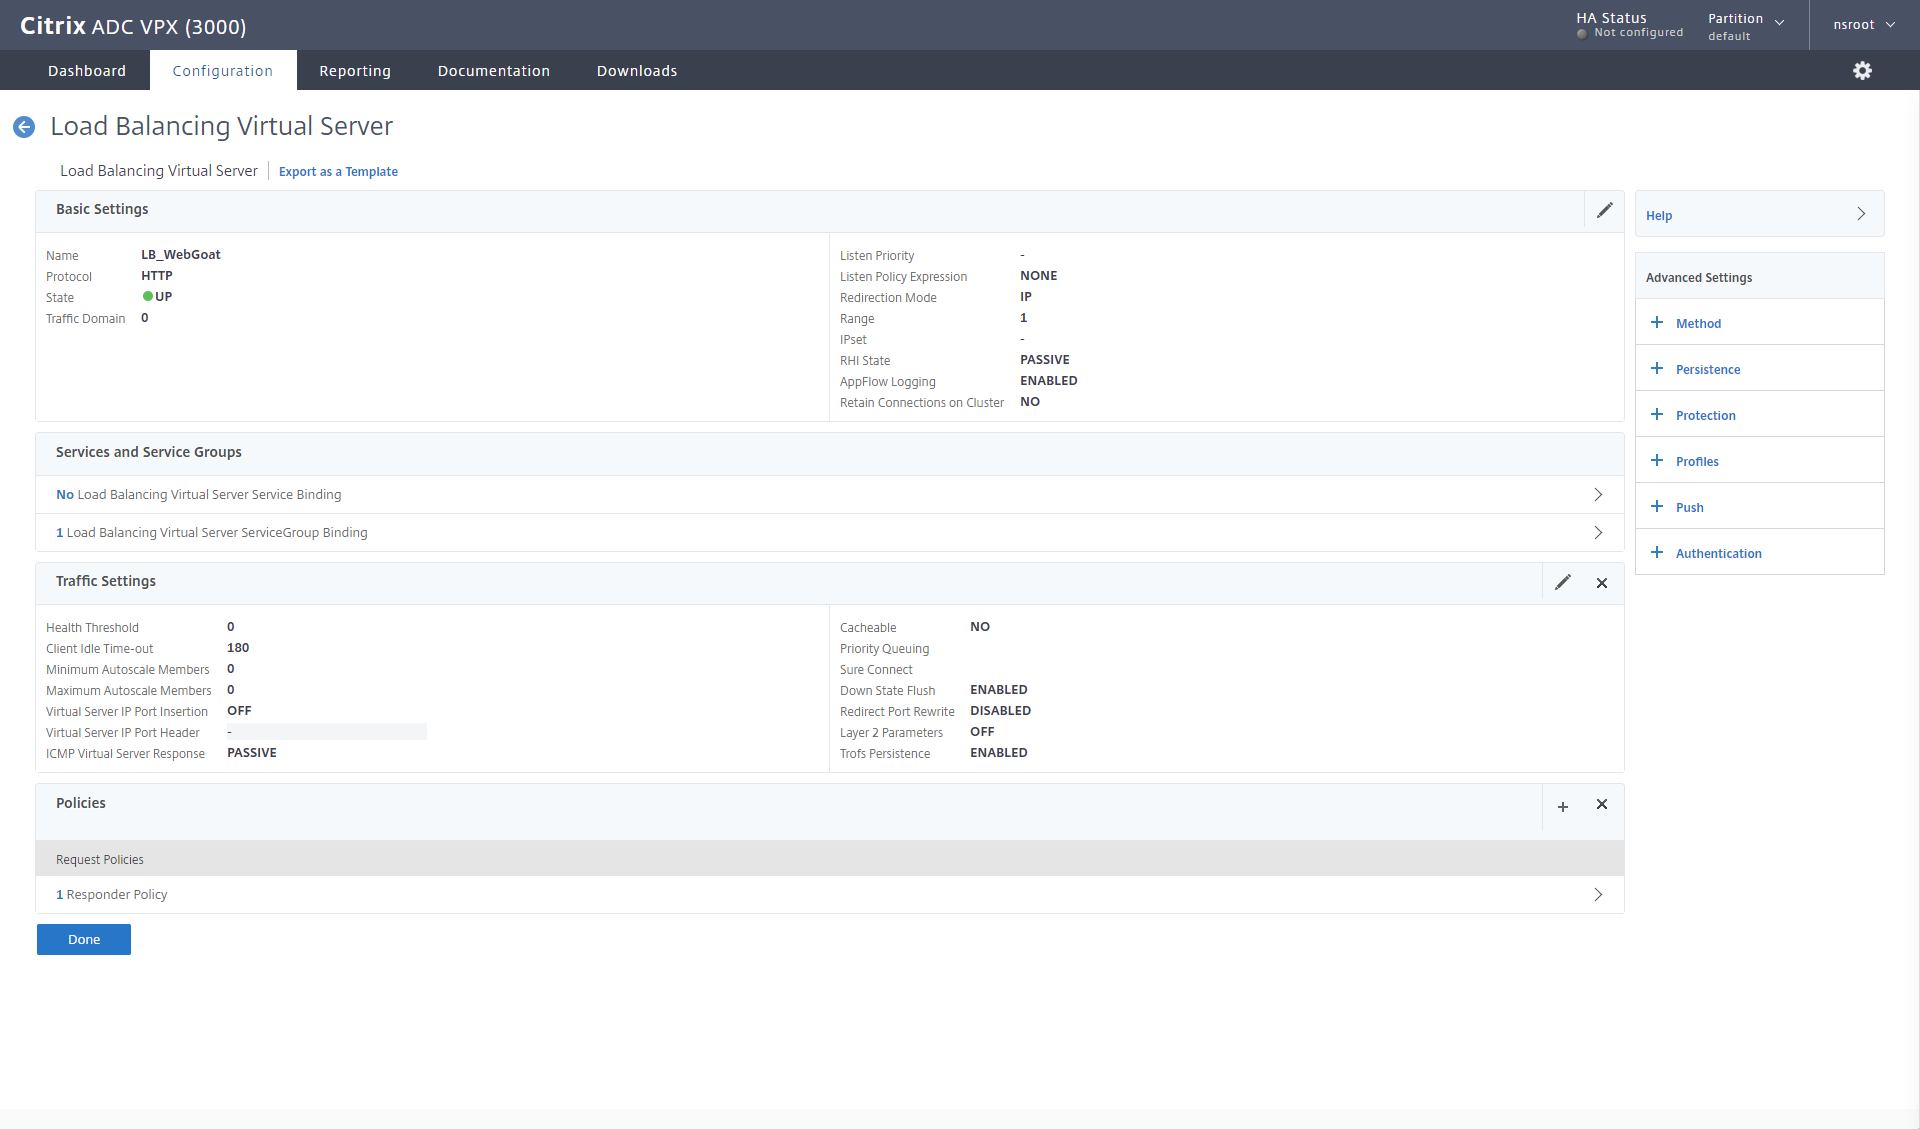
Now I have to bind it to my Load balancing server for WebGoat.
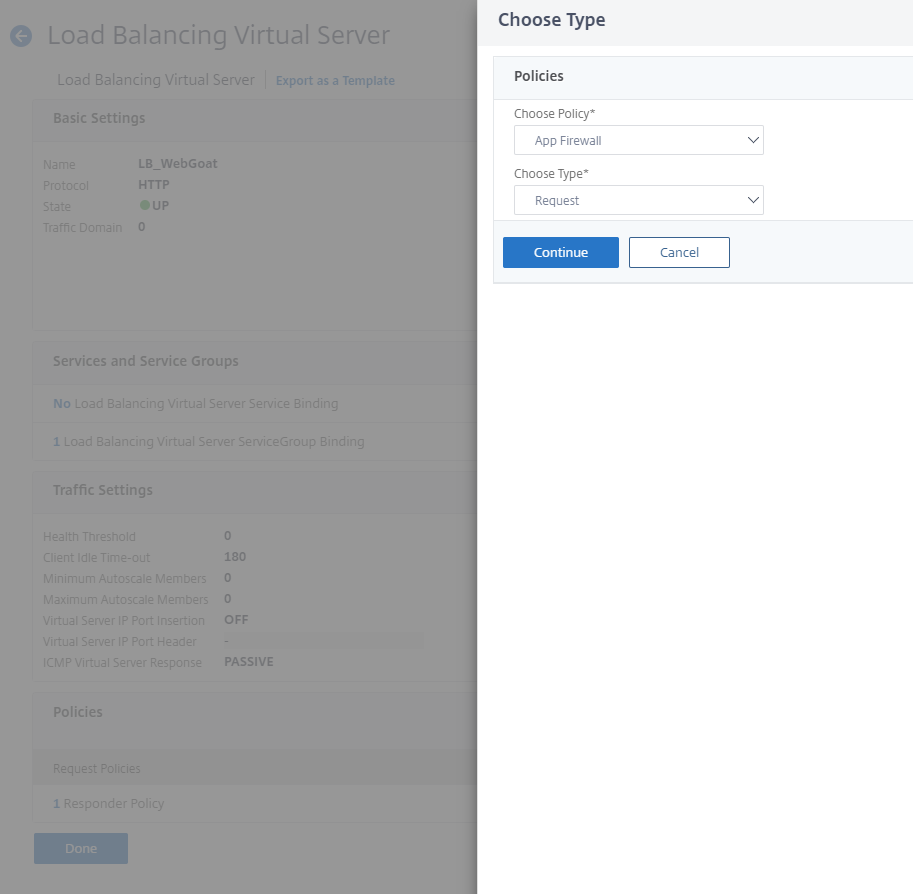
The policy is bound as an App Firewall policy on the request side.
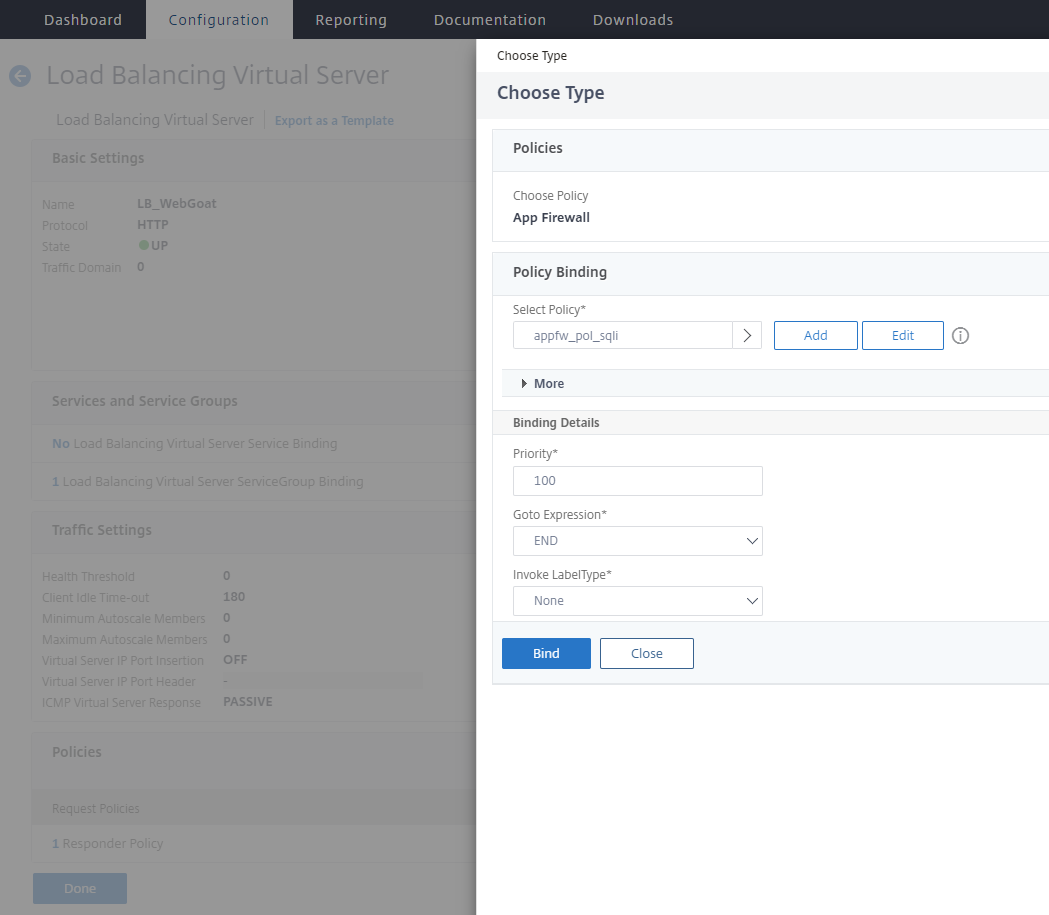
My policy is selected. 
And the binding order is given. I select END as my goto expression, because right now I don’t have any other policies I want to evaluate.
Testing with the App Firewall policy in place
Remember that our policy just logs and gives stats about it now, so how do we see if our policy is hit? Personally, I like to monitor the ns.log file using my ssh client.
When I log on my ADC I jump into the Shell and switch to /var/log folder, to keep on monitoring the ns.log. We can use the tail command, which default will show you the last 10 lines of a file. But I also want to keep on monitoring for any App Firewall log entry, so I use tail -f | grep APPFW, the option -f tells tail to watch for changes and update if anything is added within the last 10 lines.
Then when I try to SQL Injection on the Webgoat again, I can see it my log file.
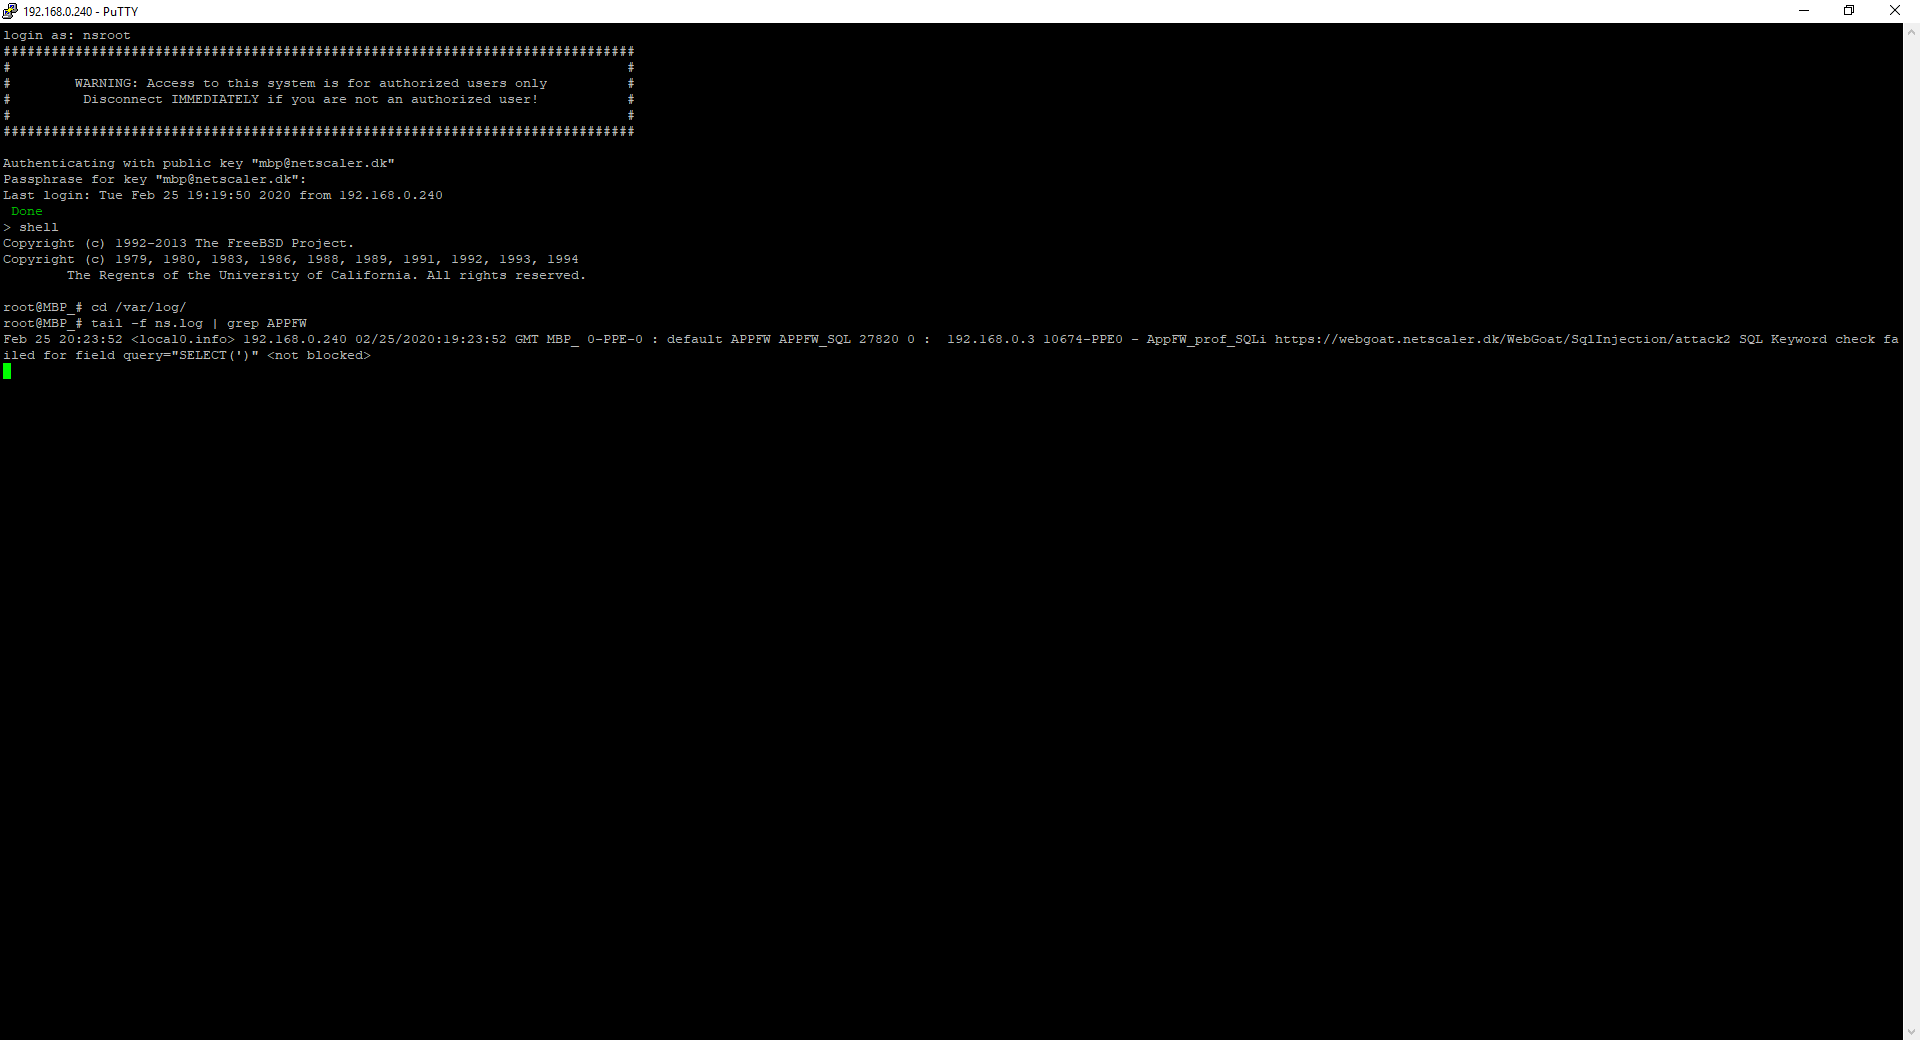
The output is here: Feb 25 20:23:52 <local0.info> 192.168.0.240 02/25/2020:19:23:52 GMT MBP_ 0-PPE-0 : default APPFW APPFW_SQL 27820 0 : 192.168.0.3 10674-PPE0 – AppFW_prof_SQLi https://webgoat.netscaler.dk/WebGoat/SqlInjection/attack2 SQL Keyword check failed for field query=”SELECT(‘)” <not blocked>
I can see that my ADC on IP 192.168.0.240 (The NSIP) reported that client 192.168.0.3, triggered the AppFW_prof_SQLi profile with a SQL keyword check for query=”SELECT(‘)” and it wasn’t blocked, because my profile only logs and stats it.
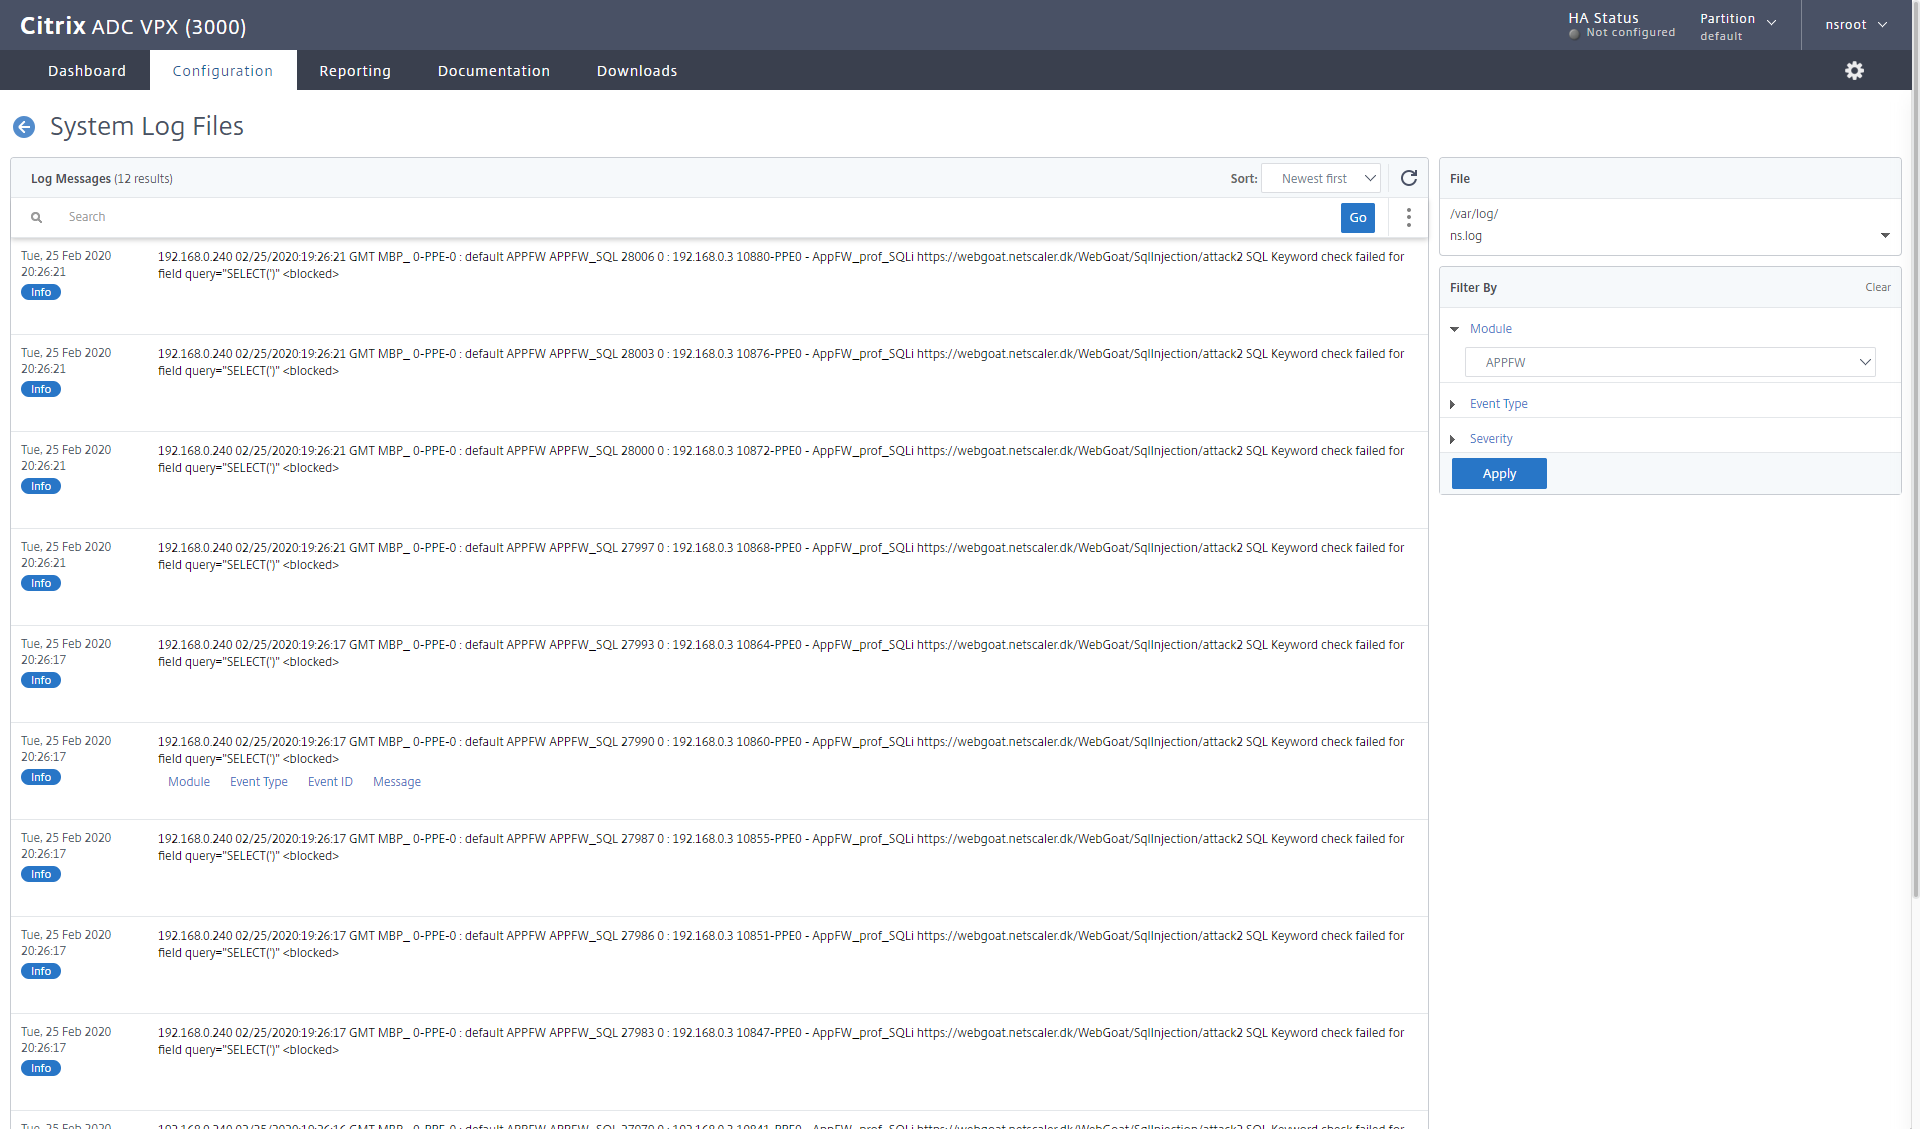
if I want to see the same in the GUI, I can open my syslog audit message (Under System – Auditing or Security – Citrix Web App firewall – Policies – Auditing – syslog messages)
I will select the module APPFW to limit the output of the ns.log 
Blocking the SQL Injection
Now it’s time to block the SQL injection. To do so, all we have to do, is change our profile security, to block also.
When I try to enter my SQL Injection on the Webgoat, nothing happens, when I click submit. 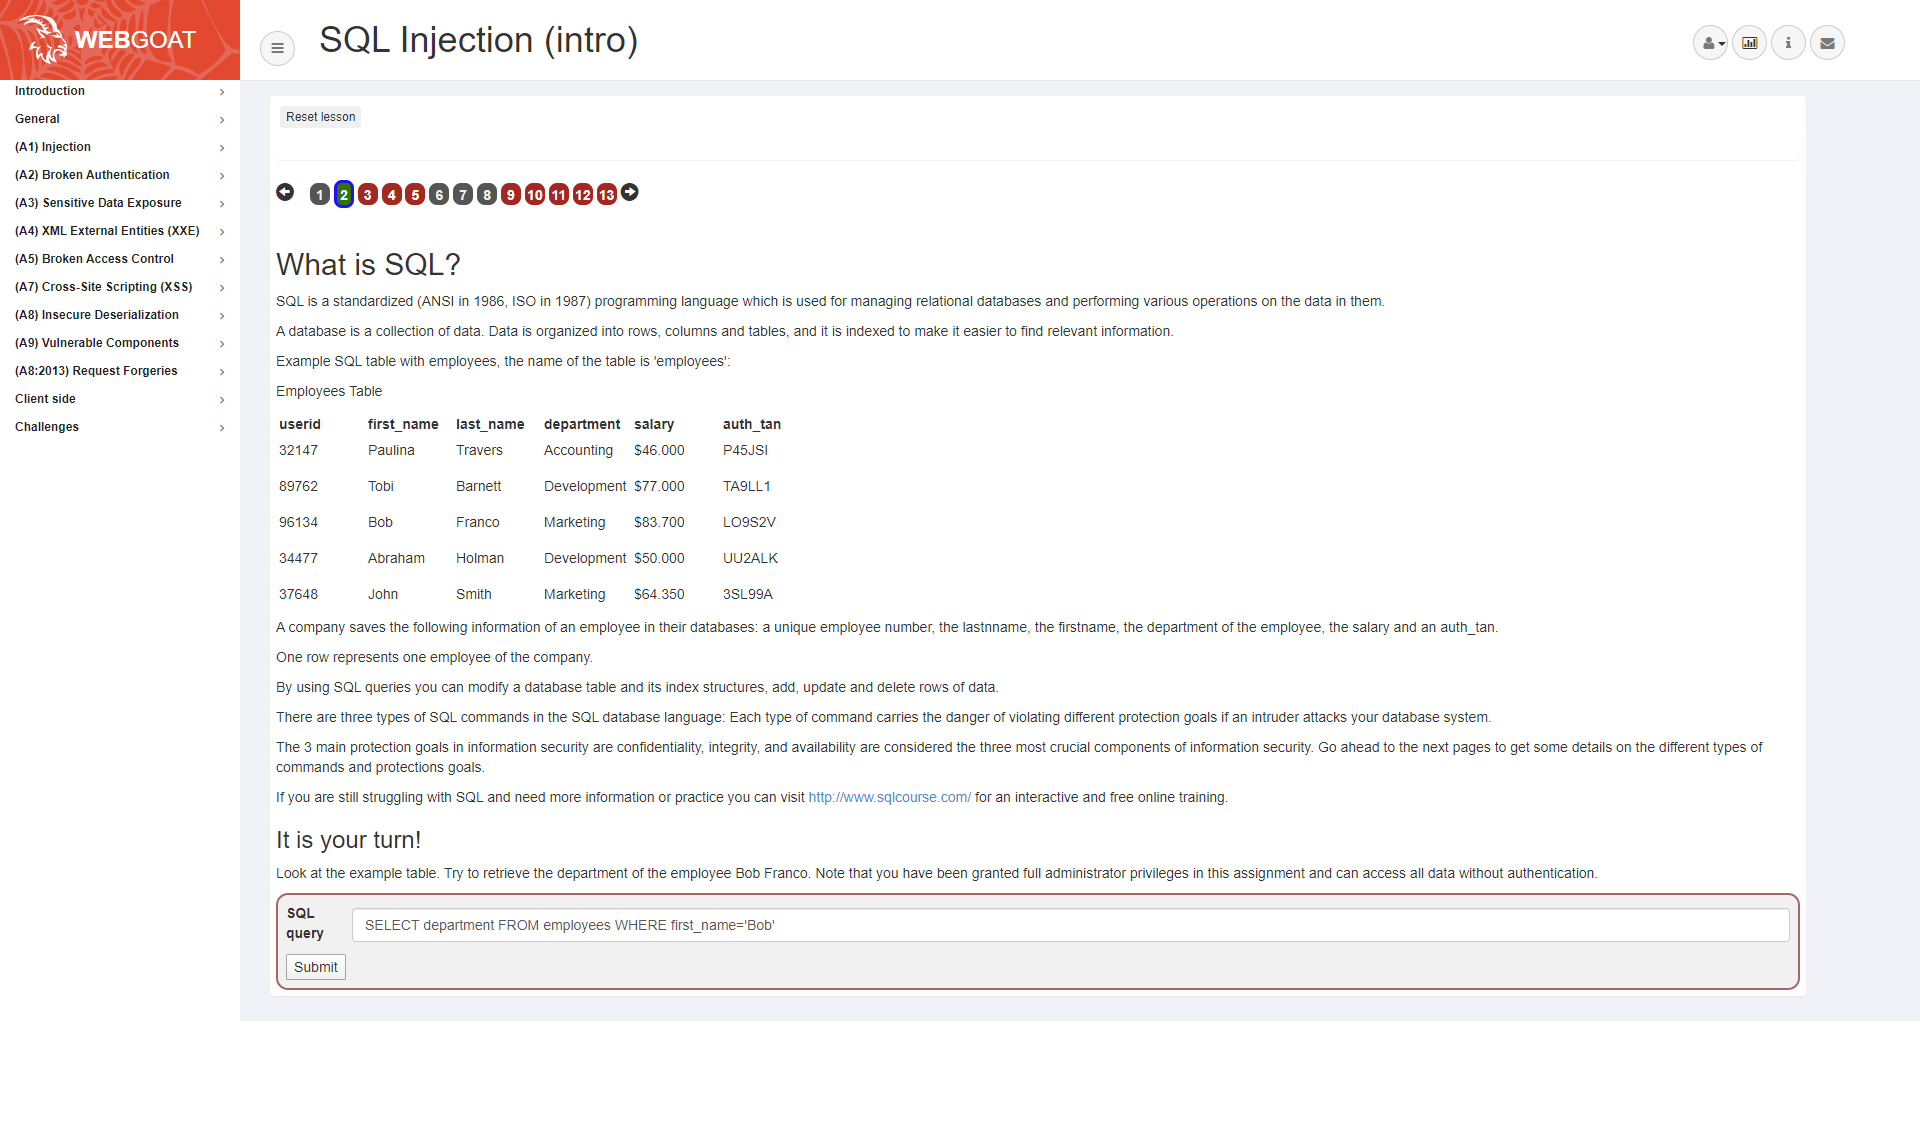
But I can see in my log, that the request was blocked. 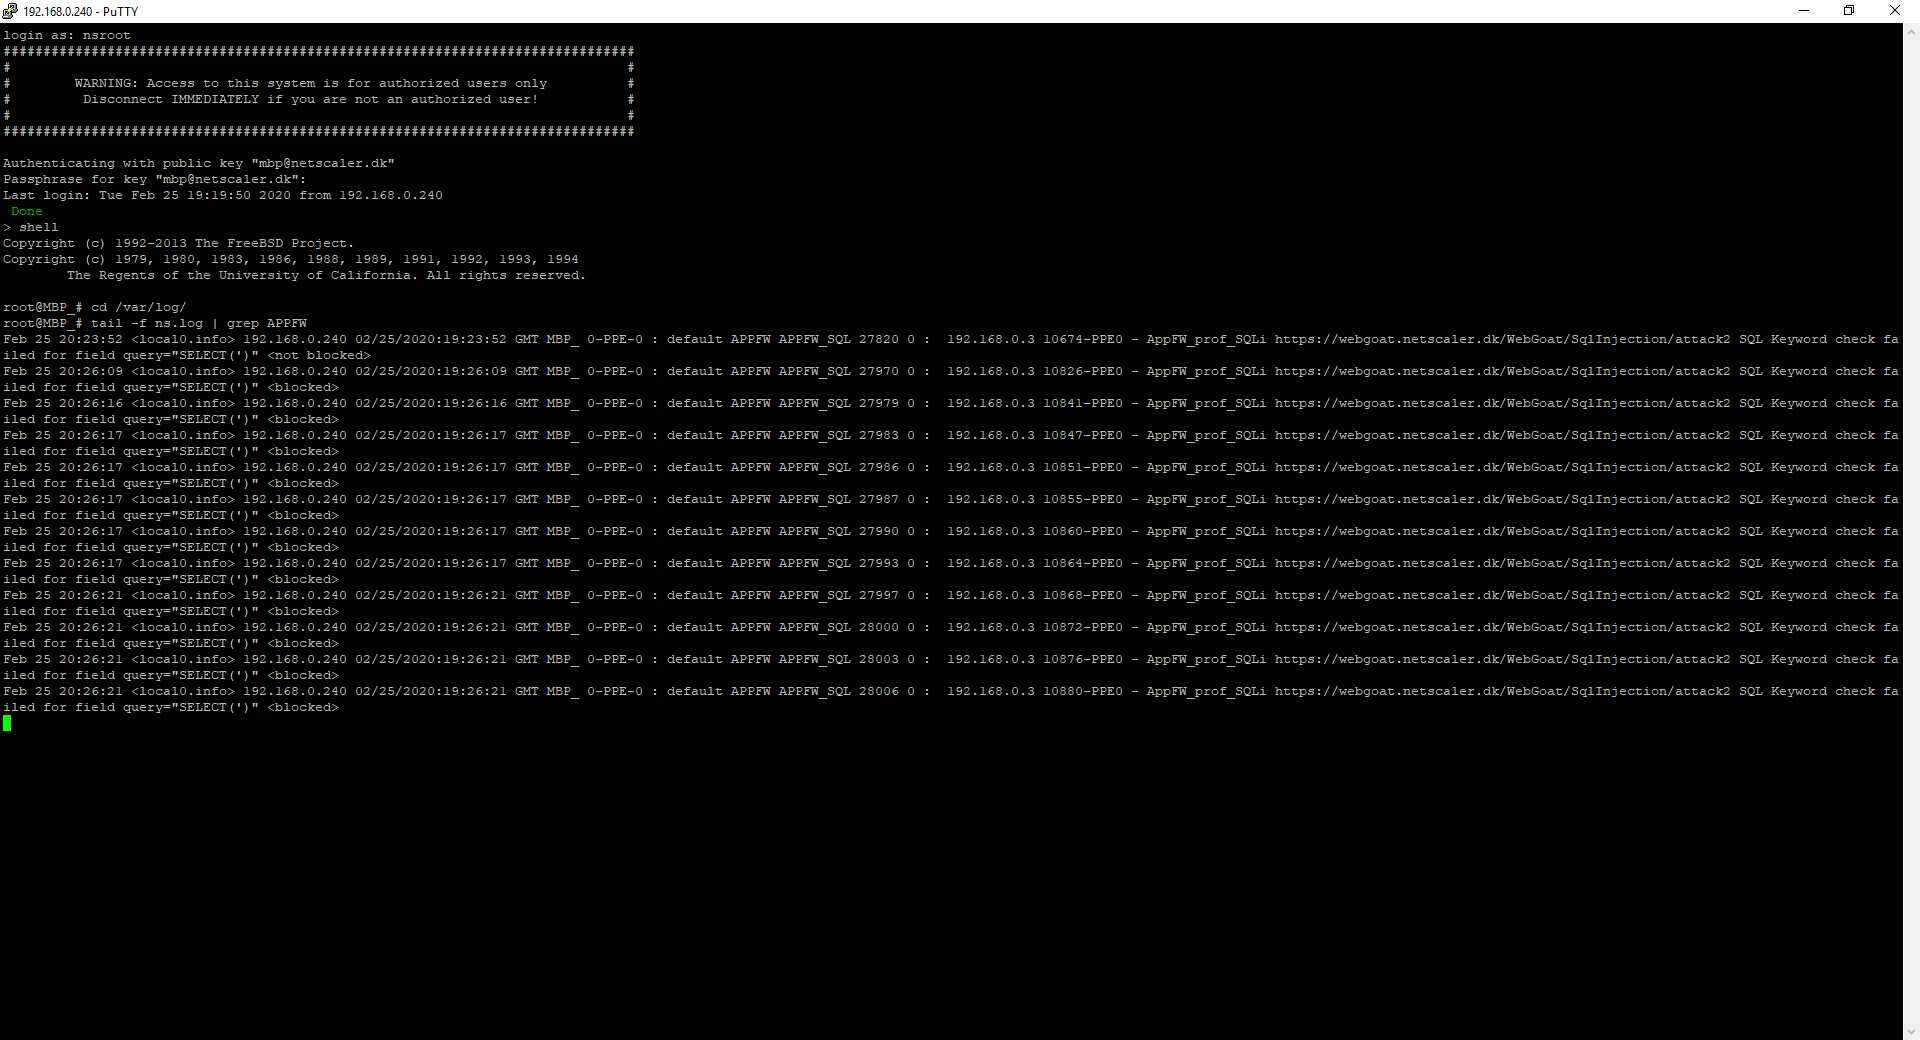
Or in the GUI.
Now a select statement might not be as dangerous you say, but they could do insert, delete or update data. Let´s look at that, while the App Firewall profile is set to LOG.
In the 3rd Injection lesson they want us to change the department of the employee called Tobi. Tobi is in Development, so maybe he created the application and therefore I don’t feel pity for him, as I change his department to sales.
My query is as following: UPDATE employees SET department=’Sales’ WHERE first_name=’Tobi’
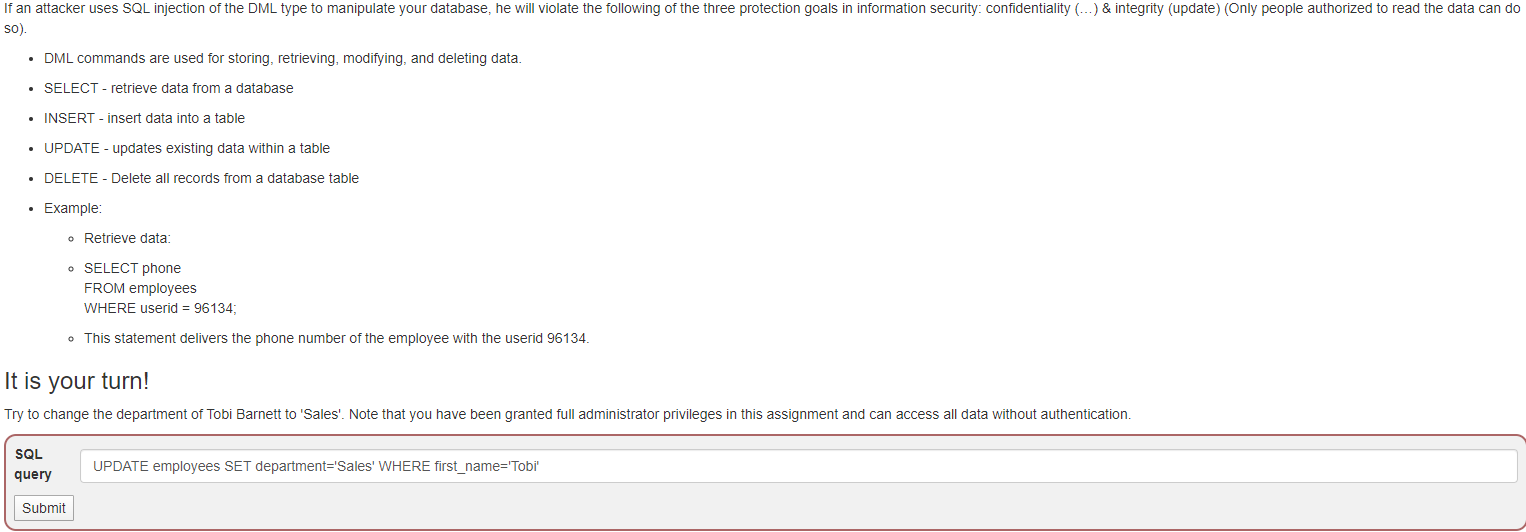
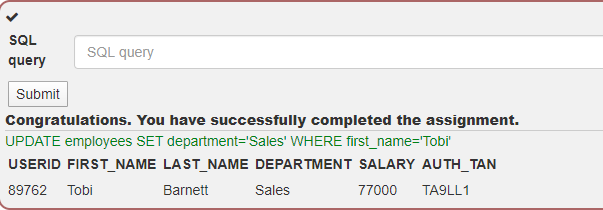
Congratulations Tobi, you’re now in sales. Maybe Tobi should have learned how parameterized the sql statements.
And our trusted tail -f ns.log shows the following entry
Mar 1 13:37:11 <local0.info> 192.168.0.240 03/01/2020:12:37:11 GMT MBP_ 0-PPE-0 : default APPFW APPFW_SQL 107534 0 : 192.168.0.3 96299-PPE0 – AppFW_prof_SQLi https://webgoat.netscaler.dk/WebGoat/SqlInjection/attack3 SQL Keyword check failed for field query=”UPDATE(‘)” <not blocked>
Being a good ADC administrator, I noticed we had a SQL injection that wasn’t blocked. I quickly switch the profile back to block, before our friendly hacker feel pity for Tobi and want to move him back to Development department with the following query: UPDATE employees SET department=’Development’ WHERE first_name=’Tobi’

Sadly, it doesn’t work, and Tobi is stuck in Sales forever.
Mar 1 13:56:43 <local0.info> 192.168.0.240 03/01/2020:12:56:43 GMT MBP_ 0-PPE-0 : default APPFW APPFW_SQL 107967 0 : 192.168.0.3 97181-PPE0 – AppFW_prof_SQLi https://webgoat.netscaler.dk/WebGoat/SqlInjection/attack3 SQL Keyword check failed for field query=”UPDATE(‘)” <blocked>